
Marketing automations are pre-programmed workflows in your Marketing Suite that help you engage clients and manage follow-ups without manual effort. Instead of reaching out to clients one by one, you set up a flow that runs automatically when specific conditions are met.
For example, a new lead fills out your sign-up form (trigger), gets a welcome email three minutes later (step 1), then an SMS two days later inviting them to book a class (step 2). If they book before step 2 fires, they exit the automation automatically (exit criteria). All of this runs without any action from you.
Your Marketing Suite includes a library of pre-built marketing automations written by marketing professionals, proven across thousands of successful studio owners, and personalized for your business using AI. You can get started in minutes without building anything from scratch. No copywriting, no design, and no scheduling required.
Every automation is made up of the following parts:
Trigger – The event or condition that starts the automation. For example, a client books a service, a lead is created, or a session pass is nearing expiration. Each automation has one trigger.
Steps – The actions that occur after the trigger fires, such as sending an email, delivering an SMS, or creating a staff task. You can add multiple steps and include time delays.
Audience filters – Optional conditions that narrow who enters the automation. For example, limit a flow to clients in a specific client group or clients with no upcoming bookings.
Exit criteria – Optional conditions that remove clients from the flow early when it's no longer relevant.
Before you begin
Before creating automations, make sure the following are in place:
Marketing Suite subscription – Automations require an active Marketing Suite subscription. For more information, see Manage your Marketing Suite subscription.
Message Center subscription – Sending SMS steps in automations requires an active Message Center subscription with a dedicated phone number assigned to your account. For more information, see Manage your Message Center subscription.
How to use marketing automations effectively
For marketing campaigns
Automations take the manual effort out of client communications, allowing your campaigns to run in the background while you focus on your business. Here are some ways you can use them:
Reconnect with inactive clients by sending a personalized offer after 30 days with no visits.
Recover lost revenue by reminding clients to complete abandoned checkouts.
Nurture new leads as soon as they enter your system with a welcome email and booking invitation.
Reward loyal clients with a special offer after they reach their 10th class.
Promote new classes or events as soon as they're added to your schedule by sending a message to your client list.
With other WellnessLiving features
Automations become more powerful when combined with other WellnessLiving features:
Purchase options – Prompt clients to repurchase when their visits are running low, helping maintain consistent revenue.
Client groups – Send tailored messages to specific segments, such as VIP members or new clients, when they're added to a group.
Rewards – Notify clients when they've earned enough points to redeem an offer and encourage them to book again.
Lead management – Automatically assign follow-up tasks to staff as leads move through your pipeline so no one is missed.
Reviews – Send a review request after a client attends a service, then follow up with a thank-you message.
Create an automation
You can create an automation from scratch or start with a pre-built automation designed for common scenarios. Pre-built automations come with a trigger, steps, templates, and settings already configured. You can personalize the content before activating.
To create an automation:
Open the App Drawer
 then click View All > Marketing Suite.
Click Create Automation.
Choose how you want to start:
Pre-built automations – Start with a ready-made automation for common scenarios. Select one from the list, review and personalize the content, then activate.
Start from scratch – Build a custom automation by choosing your own trigger and adding your own steps.
If you selected Pre-built automations:
Select a pre-built automation from the list.
Enter the Automation name and complete the remaining fields.
Click Continue.
On the Create automation page:
On the left side of the screen, update the Automation name and Description as needed.
In the center of the screen, build your automation flow:
To configure the trigger, click it in the flow to open its settings panel on the right side of the screen. Set your trigger options, then add any audience filters or exit criteria you need.
To add a step, click Add, then select the type of step you want to add.
To edit or remove a step, click Action, then click Edit or Delete.
When you're done, click one of the following:
Save – Saves the automation as a draft. It won't run until you activate it.
Save & Activate – Saves and activates the automation immediately. Clients and leads who meet the trigger conditions will begin entering the flow. For some triggers, a popup may appear if existing clients already meet the trigger conditions. See the trigger descriptions below for details.
Pre-built automations
Pre-built automations are written by marketing professionals who specialize in fitness and wellness businesses. They're proven across thousands of successful owners and personalized for your business using AI. You can activate one in minutes with no copywriting, no design, and no scheduling required.
Each one comes with a trigger, a sequence of email and SMS steps, pre-written templates, and recommended audience filters and exit criteria. You can personalize the content before activating.
Pre-built automation | What it does |
|---|---|
Lead Nurture: Free Consultation | When a new lead enters the system, this automation sends a sequence of emails and texts over 8 days inviting them to a free consultation. Emails go out daily in the early days to catch fresh interest; texts go out at the start, mid-sequence, and with a final message on day 8. Exits when the lead books, attends, or purchases. |
Lead Nurture: Cancelled Consultation | When a lead cancels their consultation, this automation sends a sequence of emails and texts over 9 days. Early messages are casual and low-pressure with an easy path to rebook. Later steps gently acknowledge that second-guessing is normal and keep the door open for leads who may need a lower-stakes entry point. Exits when the lead books a service. |
Lead Nurture: Lead No-Showed Appointment/Consultation | When a lead misses their consultation without canceling, this automation sends a sequence of emails and texts over 4 days. Early messages are short and blame-free, focused on rescheduling while the original intent is still fresh. Closes with a candid, low-pressure acknowledgment that nerves sometimes get in the way. Exits when the lead books a service. |
Lead Nurture: Post Consultation Follow-Up | After a consultation that didn't convert, this automation sends a sequence of emails and texts over 3 weeks. Opening messages are purely relational with a warm thank-you while the visit is still fresh. Messaging gradually shifts toward re-engagement without being pushy. Exits when the lead makes a purchase. |
Lead Nurture: First Class Free | When a new lead enters the system, this automation sends a sequence of emails and texts over 7 days promoting a complimentary first class so the lead can experience your studio firsthand. Exits when the lead books, attends, or purchases. |
Lead Nurture: Intro Offer Purchase Nudge | When a new lead hasn't yet purchased your intro offer, this automation sends a sequence of emails and texts over 8 days to convert them into a buyer. Every message removes friction from the purchase decision by addressing objections and clarifying what happens after sign-up. Exits when the lead purchases, books, or opts out. |
Lead Nurture: Intro Offer Welcome | When a lead purchases an introductory offer, this automation sends one email and one text on day one to make them feel confident they made the right decision, set expectations for what's ahead, and get them excited to show up. |
Lead Nurture: Intro Offer to Membership Nudge | When a client takes their first step through the door on an introductory offer, this automation sends a sequence of emails and texts over 12 days. Messages welcome them in, build connection, encourage engagement, and gradually shift the conversation toward membership as their introductory period winds down. Exits when the client purchases. |
Lead Nurture: Stagnant Lead Re-Engagement | When a lead hasn't visited within 45 days, this automation sends a sequence of emails and texts over 7 days to revive cold prospects. Opens with a low-pressure check-in, introduces a free offer mid-sequence, and closes with urgency as the offer expires. Exits when the lead attends, books, or purchases. |
Member Onboarding: New Member Welcome | When a lead purchases an introductory offer, this automation sends a welcome email and text on the day of sign-up to set expectations and reassure the new member they made a great decision. |
Member Onboarding: New Member Love | When a client purchases a membership, this automation sends a sequence of emails and texts over 13 days. Messages get the new member set up, build routine, introduce the rewards program, and encourage referrals. |
Retention: Active Member Not Visiting | When an active client hasn't visited in 14 days, this automation sends a sequence of emails and texts over 7 days to re-engage them before absence becomes a pattern. Exits when the client books a service. |
Win-Back: Client Win-Back | When a client hasn't visited in 90 days, this automation sends a sequence of emails and texts over 6 days to reconnect with former clients and invite them back. Select the offer you'd like to promote and WellnessLiving will place the discount code or purchase link into every SMS and email, making it easy for clients to act immediately. |
Manage your automations
To manage your automations:
Open the App Drawer
then click View All > Marketing Suite > Automations.
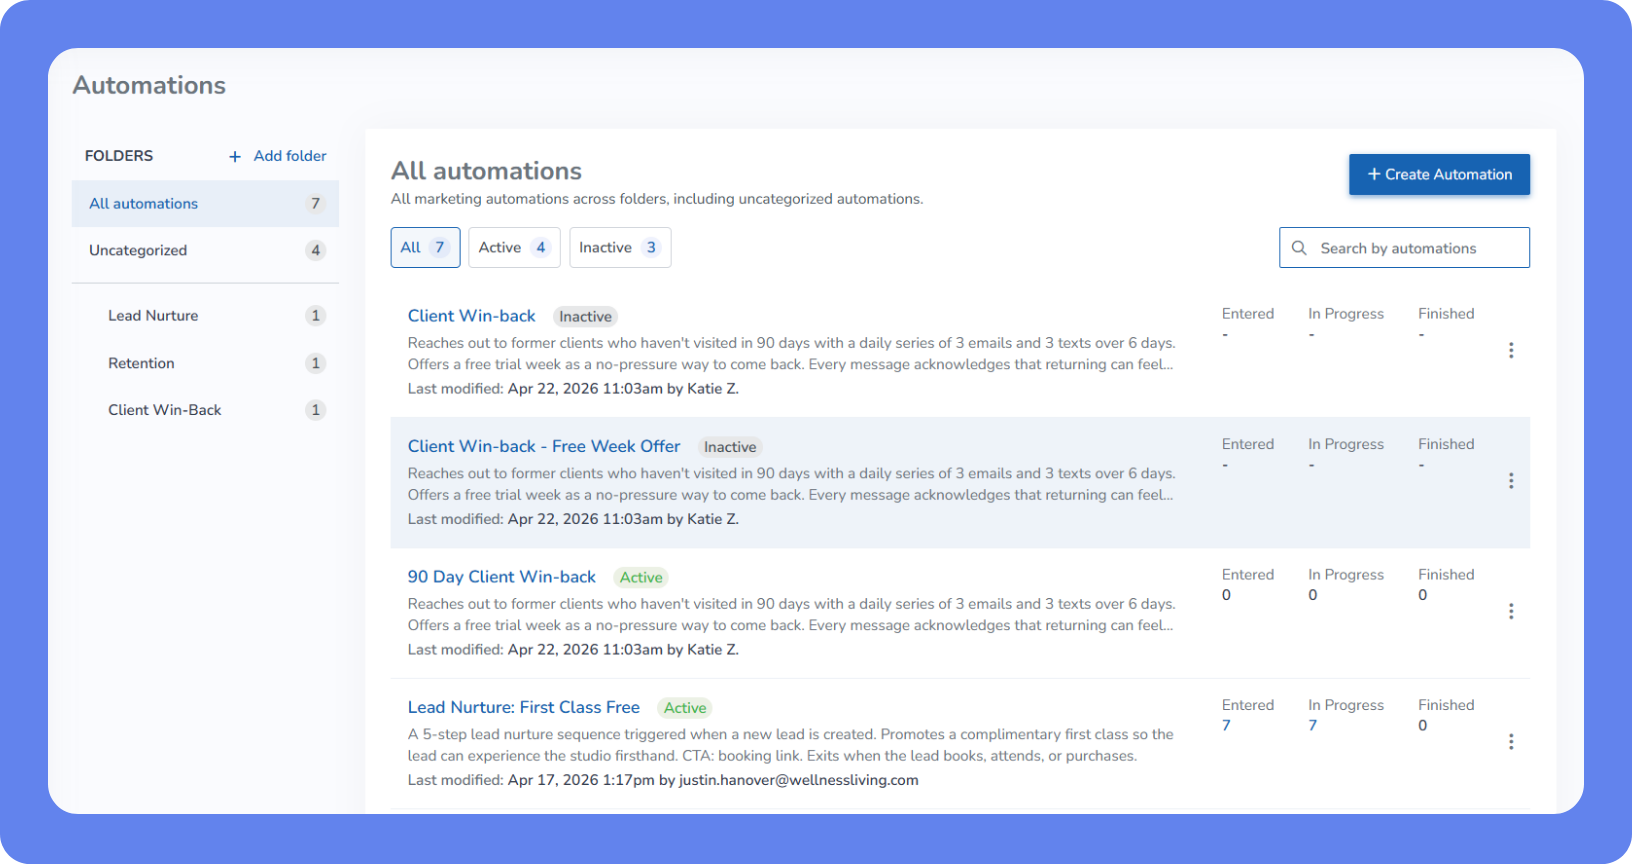
To find a specific automation, use the search bar to search by name, or use the filter tabs.
Click Action
 next to an automation and select an option from the table below.
Action | What it does |
|---|---|
Activate | Starts the automation. All required fields and steps must be configured before activating. Activating and deactivating is recorded in the Edit Log and takes effect immediately. |
Deactivate | Stops the automation. Recipients currently in progress won't receive any further steps, including those waiting in a time delay. |
Edit | Opens the automation for editing. You can edit an active automation without deactivating it first. Changes apply only to recipients who enter the flow after saving — recipients already in progress continue with the previous configuration. |
Duplicate | Creates a copy named Copy of [automation name] and adds it to the list. Open the copy to make changes before activating. |
Delete | Permanently removes the automation. Only available for automations that have never been activated. |
View automation recipients
To view automation recipients:
Open the App Drawer
then click View All > Marketing Suite > Automations.
Click the name of the automation you want to review.
Click the Recipients tab.
Use the date filter to narrow the results to a specific time period.
The summary cards at the top of the page show how the automation is performing. Click a summary card to filter the recipient list to that status:
Started – The total number of recipients who have entered the flow, including those currently in progress, finished, exited, and excluded.
In progress – Recipients currently working through the flow. A recipient can only have one active entry at a time. If the trigger fires again before they finish, they won't re-enter until their current run is complete.
Finished – Recipients who have completed every step in the flow.
Exited – Recipients who were removed from the flow early after meeting the exit criteria.
Excluded – Recipients who were manually removed by a staff member.
The recipient list shows each person's name, status, current step, lead stage, and the date they entered the flow. A client can appear more than once if the trigger fired on separate occasions. For example, a New class scheduled automation creates a new entry each time a qualifying class is added. The start date distinguishes between entries. Click a client's name to open their profile.
The Current Step column shows where each recipient is in the flow. Steps are numbered starting from Step 1 (the trigger isn't counted):
Waiting [duration] – The recipient is waiting before the next step fires. If the delay is changed while the automation is active, this column shows the updated duration for all recipients, including those already in progress.
Email – [subject line] – The recipient is on an email step. The subject line identifies which email.
Task – [task name] – The recipient is on a task step. The task name identifies which one.
SMS – The recipient is on an SMS step. Hover over the step to see the message text.
Push notification – The recipient is on a push notification step. Hover over the step to see the message text.
Finished automation – The recipient has completed all steps.
The Lead Stage column shows each recipient's current stage. This reflects the client's current stage from their profile, not their stage when they entered the automation, and refreshes when you reload the page.
You can sort the list by Start date, Current Step, Status, or Lead Stage. Status sorts in the same order as the summary cards above the table. Lead Stage sorts in your lead pipeline order. Neither sorts alphabetically.
Manually enroll a client or client group in an automation
You can manually add an individual client, lead, or client group to an automation that uses the Lead Created or Client Hasn't Visited trigger, even if they don't meet the trigger conditions. This is useful when you want to re-enroll a client who previously exited a flow, include a specific client in a targeted campaign, or add someone who narrowly missed qualifying for the trigger.
Key tips for manual enrollment
Duplicate enrollment – If a client is already active in the automation, they'll be skipped and you'll see a notification. This applies whether you're enrolling an individual client or a client group. A client can only have one active entry at a time.
Trigger and exit settings – Manual enrollment overrides the automation's enroll once setting, so you can add a client even if they've already gone through the automation and the trigger normally limits them to one enrollment. If a client has already finished or exited, the system displays a warning before you confirm. You can enroll them again or cancel. This applies to individual clients and to group members with a Finished or Exited status.
How variables populate – For manually enrolled clients, [DateAdded] reflects the date and time of manual enrollment. For automations using the Client Hasn't Visited trigger, [Delay] and [DurationDelay] calculate from the client's actual last visit date, or their profile creation date if they have no visit history.
Client groups are a snapshot – When you enroll a client group, WellnessLiving takes a snapshot of the group's membership at that moment. If the group's membership changes later, clients already enrolled aren't affected.
To manually enroll a client or client group in an automation:
Open the App Drawer
then click View All > Marketing Suite > Automations.
Click the name of the automation you want to enroll the client in.
Click the Recipients tab.
Click Add client(s) manually.
In the Add to automation popup, select Individual client or lead or Client Group(s).
Search for and select the client, lead, or client group you want to enroll.
Click Add to automation.
The client enters the automation at the first step, the same as any client who enters through the trigger automatically. Exit criteria still apply. Manually enrolled clients are marked with an Added manually badge in the Recipients tab. Hover over the badge to see more detail.
Exclude a recipient from an automation
Excluding a recipient cancels their current progress and prevents any remaining steps from running. The exclusion applies to that specific entry only. If the A lead or client can only be enrolled once setting is enabled, they won't re-enter the flow even if the trigger fires again. If it's disabled, they can re-enter the next time the trigger fires. To prevent a client from entering the flow permanently, adjust the automation's audience filters instead.
To exclude a recipient from an automation:
Open the App Drawer
then click View All > Marketing Suite > Automations.
Click the name of the automation.
Click the Recipients tab.
Find the client you want to exclude.
Click Action next to the client and select Exclude from Flow.
Automation triggers
Every automation starts with a trigger. When a client or lead meets the trigger conditions, they enter the flow and move through the steps you've set up. For the full list of available triggers and their settings, see Automation triggers.
Audience filters
Audience filters let you add extra conditions to a trigger to narrow down which clients enter the automation. For example, you could limit a "client hasn't visited" flow to clients with no upcoming bookings, so you don't message someone who already has a class on the schedule.
You can add multiple filters to a single trigger. Clients must meet all active filters to enter the flow.
Filter | Description |
|---|---|
Age | Clients whose age, calculated from the date of birth on their profile, matches one or more conditions you set. Add multiple conditions to include clients matching any one of them. Choose one of these options:
Note: Numbers you enter must be whole numbers between 0 and 120, with no decimal places. |
Bookings | Clients with no upcoming bookings, or with an upcoming booking for any or specific service(s). For additional information about event types, see Filtering by event type. Services are grouped by status. For more information, see Grouping services by status. |
Client group | Clients who belong to specific client group(s). |
CAASI intents | Leads captured by CAASI whose stated intent matches one or more selected values. Only available on automations using the Lead created trigger with CAASI selected as a lead source. For more information, see CAASI and the Marketing Suite: your automatic lead engine. |
Client type | Clients of specific client type(s). |
Gender | Clients whose gender, as set on their profile, matches one or more of the values you select: Male, Female, Prefer not to say, or Unspecified. |
Lead source | Clients whose lead source matches any or specific lead source(s). |
Lead stage | Clients in any or specific lead stage(s), based on your business's configured lead stages. |
Purchase Option status | Clients with an active Purchase Option, an expired Purchase Option, or no active Purchase Option. Can be narrowed to any or specific Purchase Option(s). |
Home location | Clients whose home location matches specific location(s). |
Past purchases | Clients who have previously purchased specific Purchase Option(s) or product(s). |
Exit criteria
Exit criteria automatically remove a client from the flow when they complete a specific action, even if the flow isn't complete. This keeps your messaging relevant. For example, if a client makes a purchase after your first reminder, they'll exit the flow and won't receive follow-ups that no longer apply.
You can add multiple exit criteria to a single trigger. A client exits the flow as soon as they meet any one of them.
Criteria | Description |
|---|---|
Client attends a service | The client checks in to any service, or a specific service(s). For additional information about event types, see Filtering by event type. Services are grouped by status. For more information, see Grouping services by status. |
Client books a service | The client makes a booking for any service, or a specific service(s). For additional information about event types, see Filtering by event type. Services are grouped by status. For more information, see Grouping services by status. |
Client makes a purchase | The client completes any purchase, or buys a specific Purchase Option(s) or product(s). |
Client responds to marketing SMS | The client replies to a text message sent by the automation, and the reply arrives within the time window you set. When this exit criterion fires, the client's status updates to Client responded to SMS.
|
Filtering by event type
When filtering by event, you can select an event type as well as individual instances. Event types with no scheduled instances are still listed and selectable. Select an event type to include every instance of that event, including ones scheduled later. Select individual instances instead if you only want specific dates.
Where this applies:
Automation triggers – Client canceled booking, Client no-show, Service attended, Service booked
Audience filters – Bookings
Exit criteria – Client attends a service, Client books a service
Grouping services by status
When choosing Specific service(s) in the Bookings audience filter or the Client attends a service and Client books a service exit criteria, the service selector groups services by status, with Active listed first and Inactive second. Within each status, services are grouped by service type (appointments, assets, events, gym visits, packages, and so on).
The Inactive group only appears if a service was already selected in this automation and has since been deactivated. If none of your selected services have been deactivated, the Inactive group doesn't appear. This keeps the list focused on what matters for this automation, instead of showing every retired service in your account.
If a service you've already selected later becomes inactive, its chip displays a small icon marking it as inactive. Hover over the icon to see the tooltip Inactive.
Search filters the list while keeping the Active and Inactive grouping intact. Select all selects every visible service. If a search filter is active, this selects only the filtered results, not the full list. Clear all removes all selections.
Where this applies:
Audience filters – Bookings
Exit criteria – Client attends a service, Client books a service
Automation steps
Steps are the actions your automation takes after the trigger fires. You can add a maximum of 50 steps, including the trigger, delay, and all action steps, and arrange them in any order. Use time delays between steps to pace your communications and avoid overwhelming clients.
Need help with what to write? For Send email, Send SMS, and Send push steps, click Writing Assistant to describe what you want to say and generate content automatically. Writing Assistant is available with Marketing Suite Pro. For more information, see Generate content with the Writing Assistant.
Step | Description |
|---|---|
Time delay | Pauses the flow for a set amount of time before the next step. For example, send a welcome email right away, then wait three days before sending an SMS follow-up. |
Send email | Sends a personalized marketing email to the client. You can customize the subject line, body content, and sender details. Click Variables to see the variables available for this message. |
Send SMS | Sends an automated text message to the client's mobile number. Works best for short, time-sensitive messages. Click Variables to see the variables available for this message. Note: Requires an active Message Center subscription with a dedicated phone number. If your business doesn't have one, you'll be prompted to subscribe when adding an SMS step. The subscription page opens in a new tab so you don't lose your progress. |
Send push | Sends a push notification through the Achieve Client App. The client must have the app installed with notifications enabled. |
Create task | Assigns a follow-up task to a staff member. Configure the task name, assignee, due date, status, and optional description. Set Associate task to client to ON to link the recipient's client profile to the task. |
Change lead stage | Moves a lead or client to a stage you choose, so your stages stay up to date without staff manually updating them in the Lead Management Report. Choose the stage from the Stage dropdown. The stages you see come from your business's Lead Stages page (Setup > Leads > Lead Stages). For more information, see Set up and manage lead stages. By default, this step can only move a lead or client to a stage that comes later in your stage order. If the lead or client is already at or past the stage you chose, the step does nothing. Set Allow moving to an earlier stage to ON if you want this step to also be able to move them back to an earlier stage, such as from Hot to Warm. If the stage referenced by this step is deleted, the step automatically switches to the replacement stage selected in Lead Stages. |
Notify staff by email | Sends an email to the staff members or roles you choose, so your team knows the moment a client reaches this step. This doesn't pause the automation. The email goes out and the automation keeps moving. Click Variables to see what you can use in this message. For more information, see Notify staff from an automation. |
Next steps
Once your automations are running, they work in the background so you can focus on your business. Pair them with templates and campaigns for a complete marketing approach.
What's changed with your marketing automations?