
Marketing templates are reusable email, SMS, and push notification designs that you can use when sending campaigns or building automations. Templates are created and managed from the Templates page in the Marketing Suite.
Building a library of marketing templates keeps your branding and messaging consistent no matter who on your team is hitting send, and saves time by letting you select a template and start sending instead of writing from scratch each time. If you activate a pre-built automation, its included templates are automatically added to your library so you have a ready-made collection to build from.
Before you begin
Before creating templates, you'll need an active Marketing Suite subscription. For more information, see Manage your Marketing Suite subscription.
Create a template
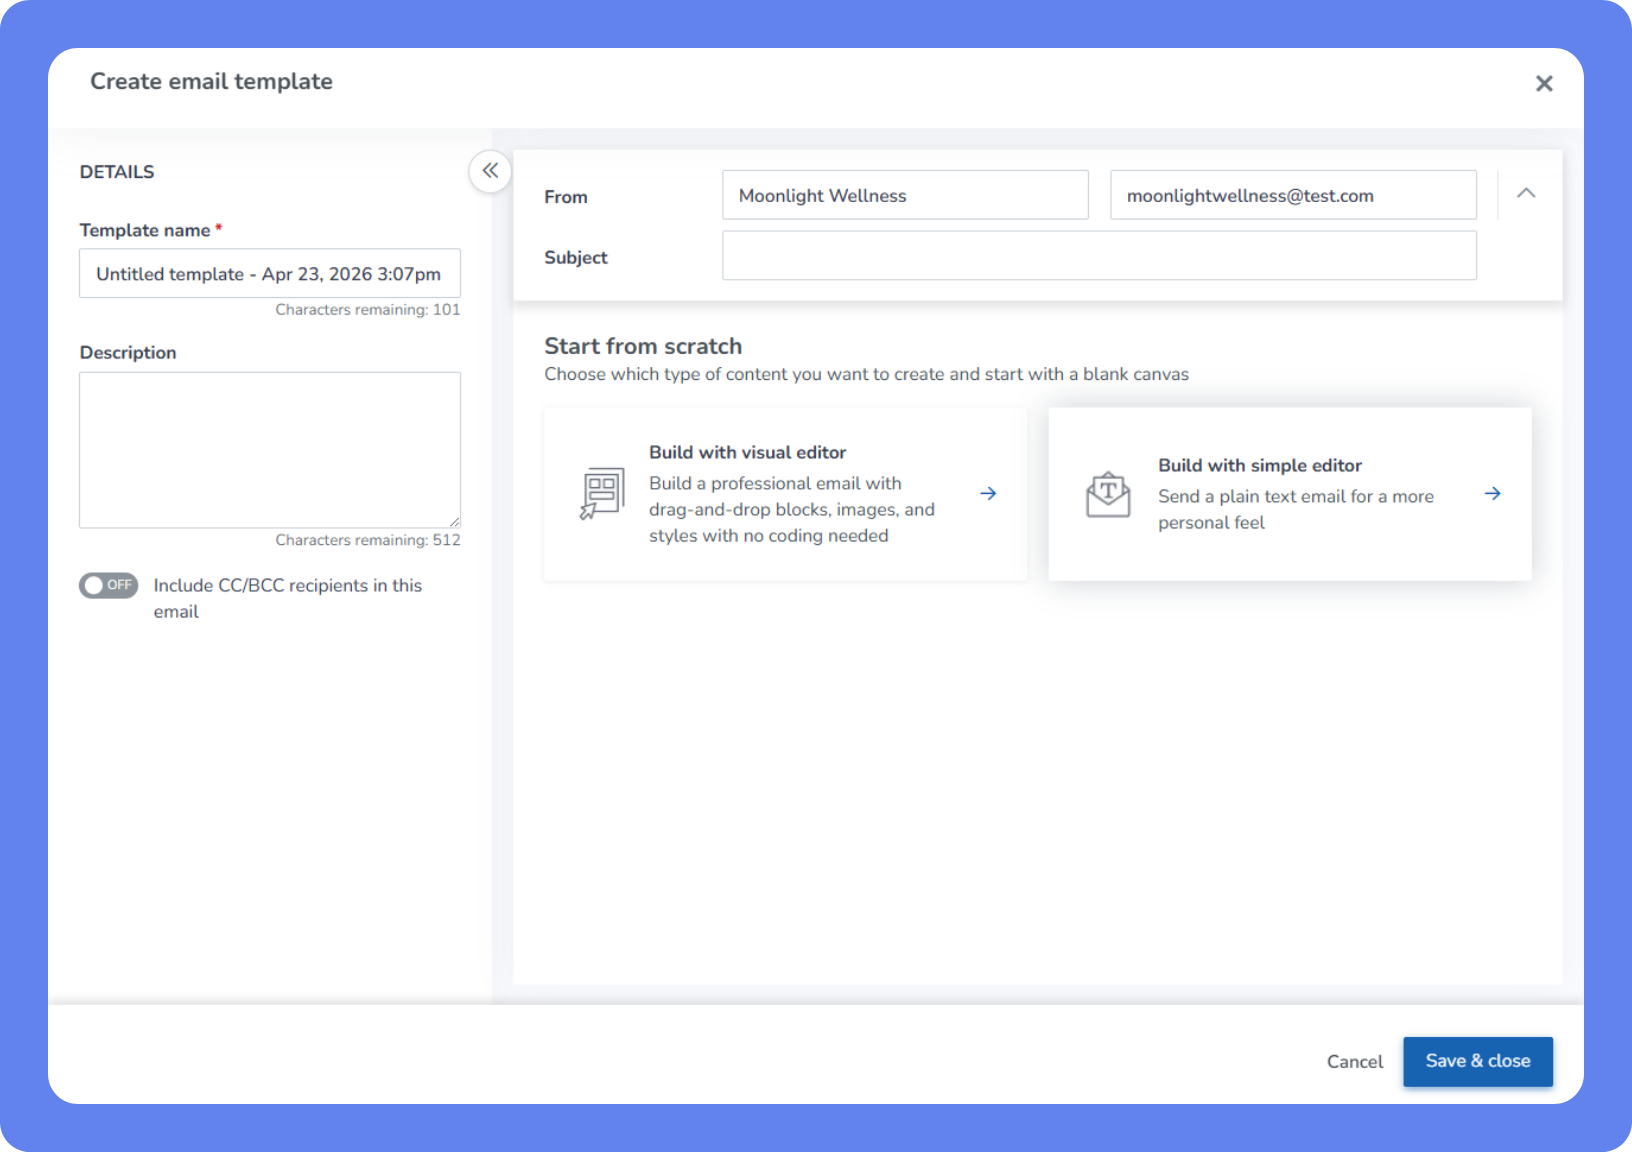
To create a template:
Open the App Drawer
 then click View All > Marketing Suite > Templates.
Click Create Template and select Email, SMS, or Push.
Enter a Template name and a Description.
If you're creating an email template, choose your editor. If you want to design a professional-looking email with images, buttons, and branding, choose the visual editor. If you just need to write a simple text email, the simple editor is faster.
Build with visual editor – A drag-and-drop editor with advanced layout and design options. For more information, see Modify an email template using the visual editor.
Build with simple editor – A basic text editor for straightforward email content.
You can switch between editors at any time. Switching from the visual editor to the simple editor will remove any unsupported elements, such as countdown timers or social media buttons.
Write your message content in the editor.
Need help with what to write? Click Ask ISAAC, describe what you want to say, and Isaac will draft the content for you.
For email and SMS templates, click Variables to insert dynamic content such as a client's name or business details.
When a template is used inside an automation, additional variables specific to that automation's trigger become available. For example, a template used in a Service attended automation may include variables related to the service the client attended. For more information, see Manage your marketing automations.
Variables aren't available for push notification templates.
When you're done, click Save & Close.
If you see an error about an image stored inside the email when saving, see How to resolve an "Images cannot be embedded" error.
Send a test message
You can send a test email or SMS before using a template in a campaign to check how it looks for recipients. Test messages display placeholder text for variables. For example, a client name variable may appear as a sample value rather than a real name.
You can send test messages to up to 10 unique recipients per day across email and SMS combined. When the limit is reached, you'll receive a message stating “You’ve reached the daily limit of 10 unique test recipients (shared across email and SMS).”
Test sending is not available for push notification templates.
To send a test email:
While editing an email template, click Send test email.
Enter the email address to send the test to.
Click Send.
To send a test SMS:
While editing an SMS template, click Send test SMS.
Enter the phone number to send the test to.
Click Send.
Edit a template
To edit a template:
Open the App Drawer
then click View All > Marketing Suite > Templates.Find the template you want to edit. Use the search bar or filter buttons to narrow down the list.
Click the template name, or click Action
 next to the template and select Edit.
Make your changes.
Click Save & Close.
If you see an error about an image stored inside the email when saving, see How to resolve an "Images cannot be embedded" error.
How to resolve an "Images cannot be embedded" error
WellnessLiving doesn't allow images that are pasted into email templates or stored inside the email's code, because these images can make your email too large to deliver. Add images using a hosted image URL instead: a link to an image that's already online, like one on your website or an image-hosting service. If your template was created before this rule was introduced, it may still contain hidden image data in its code, even after you deleted the image from the editor.
This means you may see this error even when no image appears in the template: This template contains an image stored inside the email, which is not allowed. Use the Insert image button to add an image URL instead. The template either fails to save, or appears to save but reverts to its previous version.
To resolve an Images cannot be embedded error:
Open the template in the simple editor.
Click Source code
 in the toolbar.
Find any <img> tag that starts with data:image or blob:https://.
Delete the entire tag.
Click Save in the source code editor.
Click Save & Close.
If the error continues after you remove the tags, clear the template's code completely:
Copy the text items you want to preserve from the email body so you don't lose it.
Select all content in the email body and delete it.
Add your logo using the Logo variable or the Insert image button with a hosted image URL.
Paste your text back into the email body.
Click Save & Close.
Duplicate a template
Duplicating a template creates a copy you can modify without affecting the original. The copy is named Copy of [template name] and is added to your template list automatically.
To duplicate a template:
Open the App Drawer
then click View All > Marketing Suite > Templates.Find the template you want to duplicate.
Click Action
next to the template and select Duplicate.If needed, click the new template to open it and make any changes, then click Save & Close.
Archive and restore a template
Archiving a template hides it from your active template list without deleting it. You can restore an archived template at any time.
To archive a template:
Open the App Drawer
then click View All > Marketing Suite > Templates.Find the template you want to archive.
Click Action
next to the template and select Archive.In the confirmation popup, click Archive.
To restore an archived template:
On the Templates page, clear the active filter to show archived templates.
Find the template you want to restore.
Click Action
next to the template and select Restore.
Delete a template
Deleting a template permanently removes it and can't be undone.
To delete a template:
Open the App Drawer
then click View All > Marketing Suite > Templates.Find the template you want to delete.
Click Action
next to the template and select Delete.In the confirmation popup, click Delete.
Templates page reference
Here's what you'll see on your Templates page and what each column means, so you always know where to find what you're looking for.
Column | Description |
|---|---|
Name | The template name. Click the name to open the template in the editor. |
Type | The communication type: Email, SMS, or Push. |
Created by | The date the template was created and the name of the staff member who created it. |
Last modified by | The date the template was last edited and the name of the staff member who made the change. |
Action | Opens a menu with options to use, edit, duplicate, archive, or delete the template. |
Filters on the Templates page
Use these filters to narrow down your template list when your library starts to grow.
Filter | Description |
|---|---|
All / Email / SMS / Push | Quick filter buttons at the top of the page. Each shows a count of templates of that type. |
Status | Filter by Active or Archived. Active templates are shown by default. |
Created by | Filter by the staff member who created the template. |
Next steps
Your templates are ready to use across campaigns and automations. The more you build out your library, the faster your team can move.