
Every business has clients who visited once or twice and then went quiet. They didn't cancel, they didn't complain — they just stopped showing up. A win-back automation reaches out to those clients automatically with a targeted sequence of emails and SMS, reminding them why they came in the first place and giving them a reason to come back.
It runs in the background with no manual effort. You set it up once, and every time a client crosses the inactivity threshold you define, the sequence starts on its own.
In this article, you'll learn how to activate the pre-built win-back automation inside Marketing Suite — the fastest way to get up and running. If you want more control over timing, messaging, and audience, you'll also find steps for building a custom win-back automation from scratch.
Before you begin
Before setting up your win-back automation, confirm the following:
Marketing Suite subscription: Your account must have an active Marketing Suite subscription. If you don't see Marketing Suite in your sidebar, contact WellnessLiving support.
Email settings configured: Your business email address must be set up in Marketing Suite. If you haven't done this yet, see Set up your business email settings.
Domain verification (recommended): Verifying your sending domain improves deliverability. See Verify your sending domain.
Message Center (optional): If you want to include SMS steps in your win-back automation, Message Center must be active on your account. The automation works with email only if you don't have Message Center.
Purchase Option set up: The win-back automation requires you to select an offer to promote to lapsed clients. You'll need at least one Purchase Option already created in your account before you can complete the setup. If you haven't set one up yet, see Create a Purchase Option.
Use the pre-built win-back automation
The fastest way to launch a win-back automation is to use the pre-built win-back trigger. It comes with professionally written messaging, pre-configured timing, and a suggested audience filter. ISAAC AI personalizes the content for your business when you activate it, so you can review and tweak everything before it goes live.
Find the win-back automation
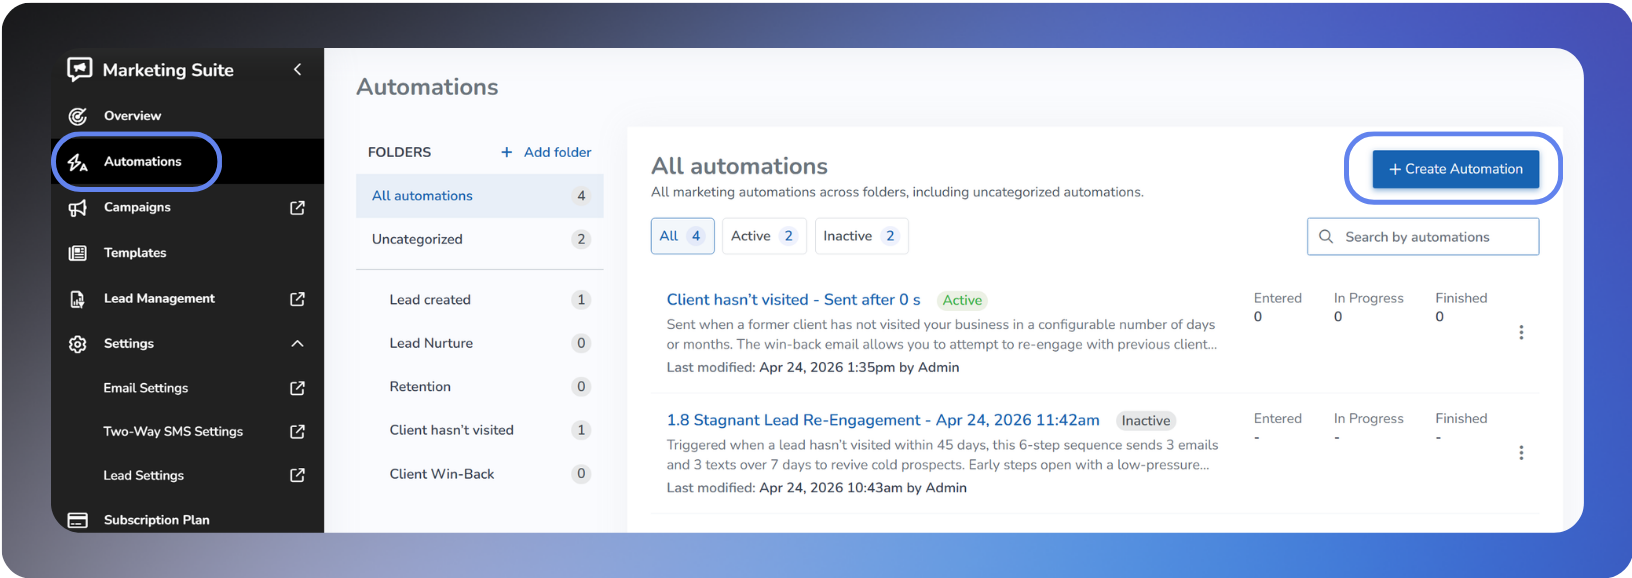
To open the win-back automation:
Log in to WellnessLiving and go to your dashboard.
In the left sidebar, click Marketing Suite.
Click the Automations tab.
Click the Create automation button on the top right.
On the How would you like to start screen, select Pre-built automations and choose the category tab for Win Back.
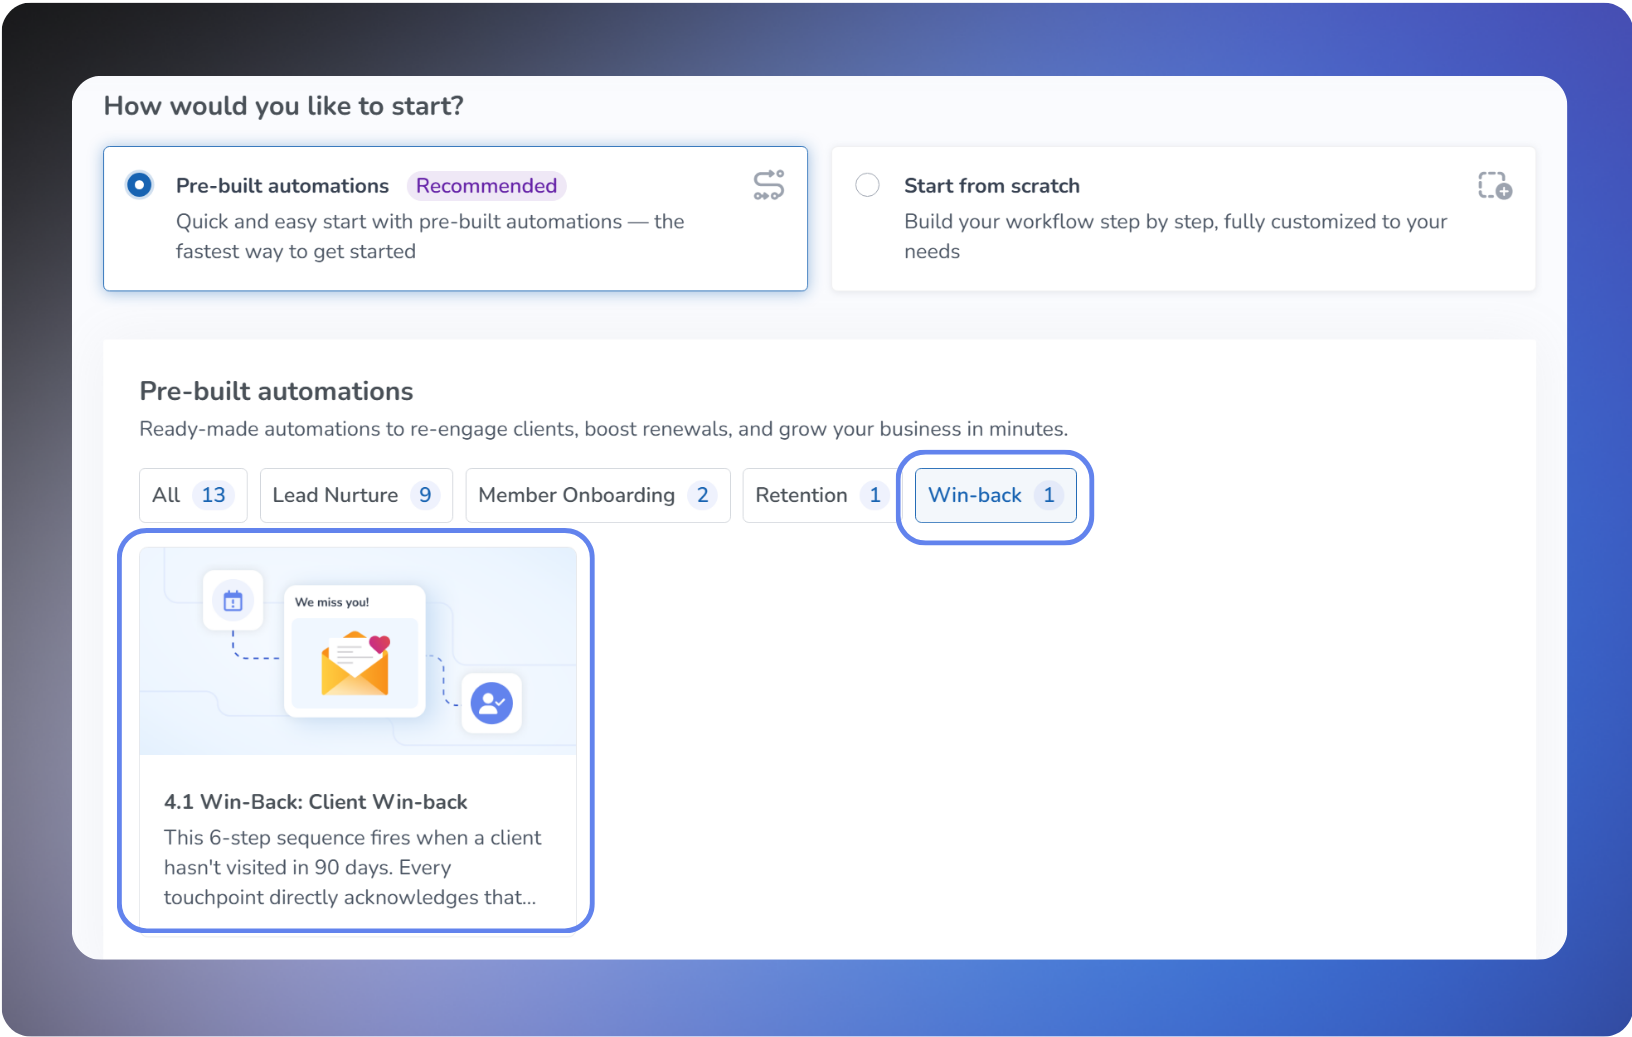
Select the 4.1 Win-Back template and click it to open the setup.
Note: If you don't see a Win-Back template, make sure you're on the Win-back category tab in the pre-built automations library.
Set up your offer
After selecting the template, you'll be prompted to configure the offer you want to promote to lapsed clients. This is how WellnessLiving personalizes the messaging and places the right booking link or discount code into every email and SMS in the sequence.
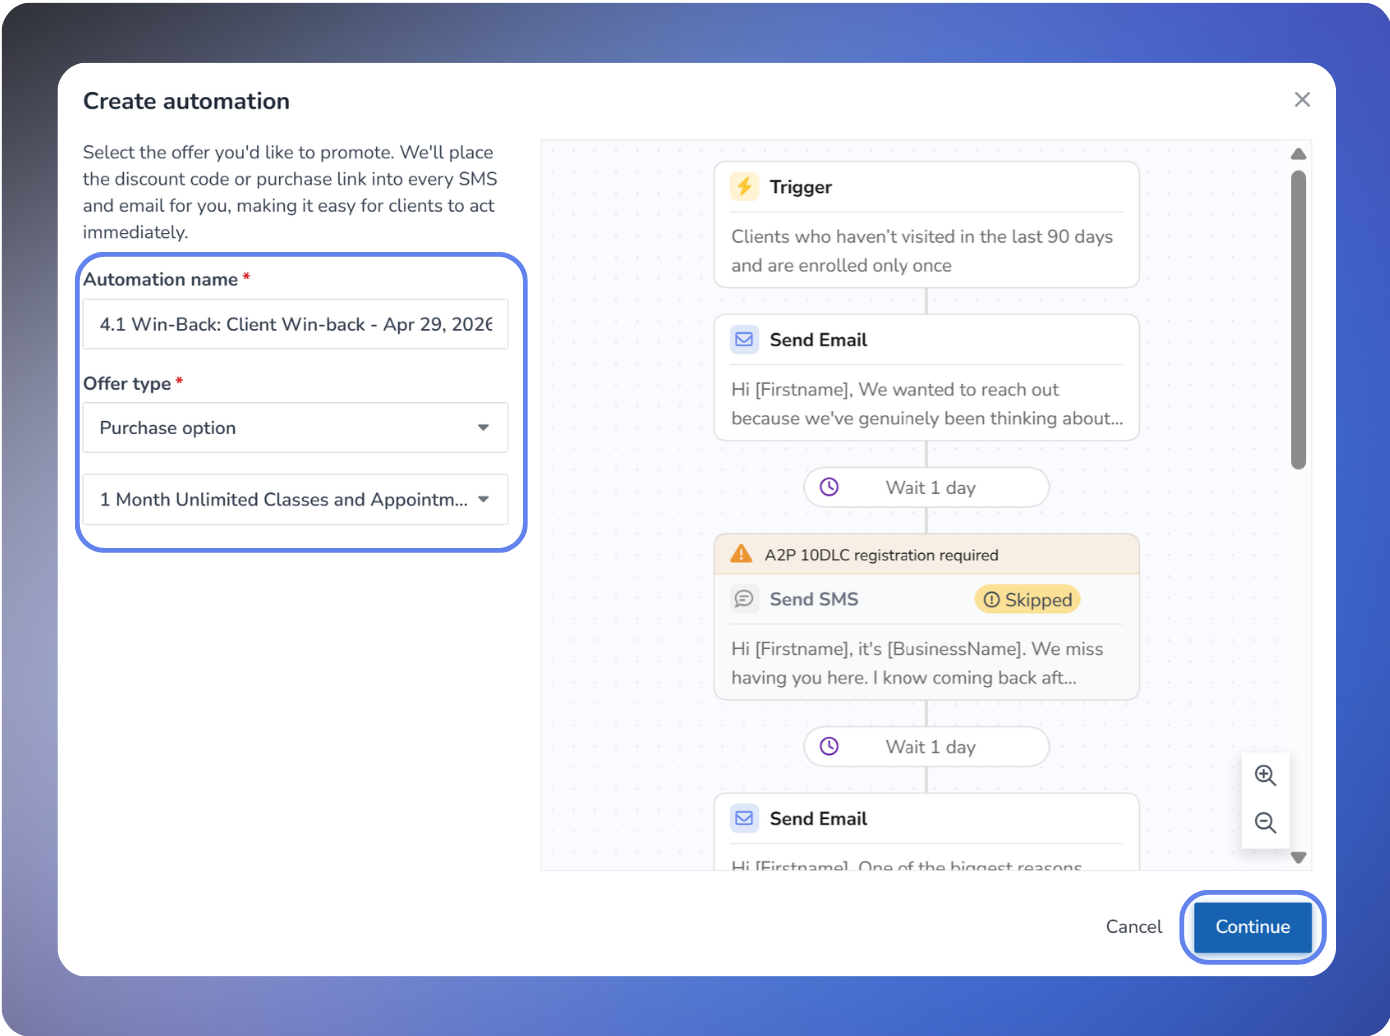
To set up your offer:
In the Automation name field, review the default name and edit it if needed.
In the Offer type dropdown, select the type of offer you want to promote, for example, Purchase option.
In the second dropdown, select the specific Purchase Option you want to feature in the win-back messages.
Click Continue.
ISAAC will build the automation and load the setup page.
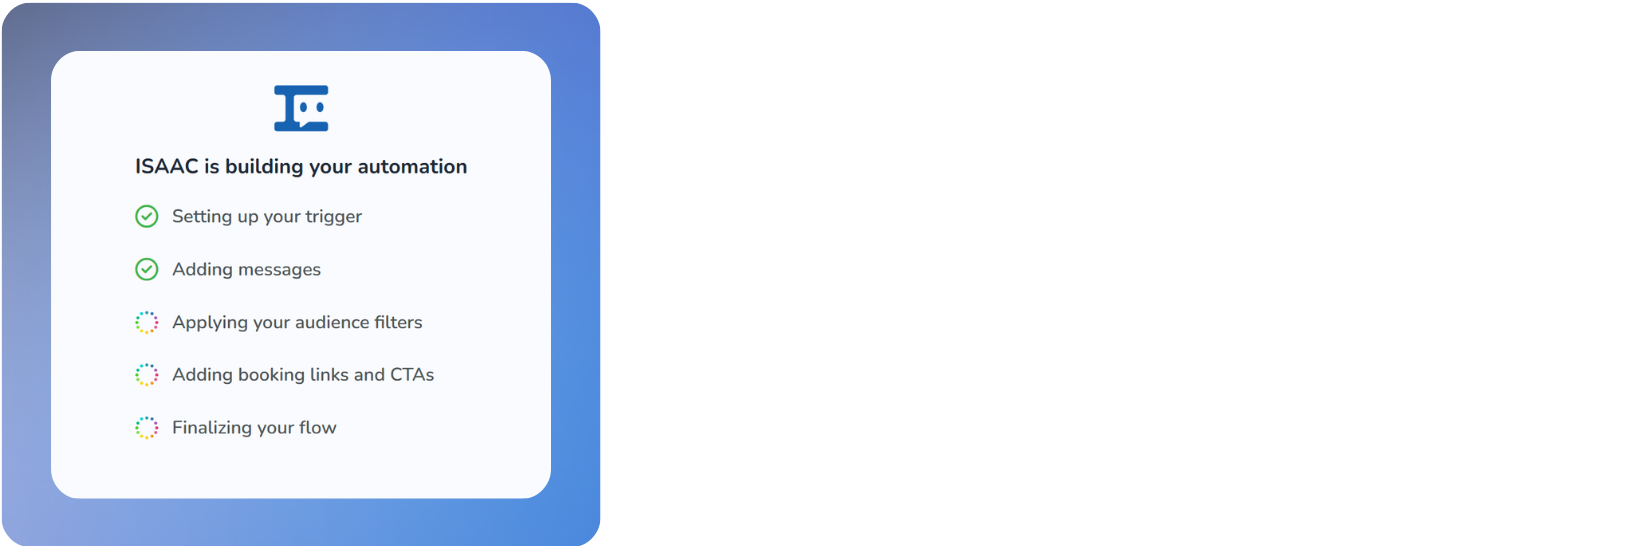
Note: You must have at least one Purchase Option set up in your account to complete this step. If the dropdown is empty, set up a Purchase Option first and then return to this flow.
Review the trigger settings
The pre-built win-back automation targets clients who haven't visited your business during a set time period. Before activating, confirm the audience is set correctly or adjust it to suit your business.
To review the Time Since Last Visit filter:
Use one of the following approaches to define your lapsed client audience:
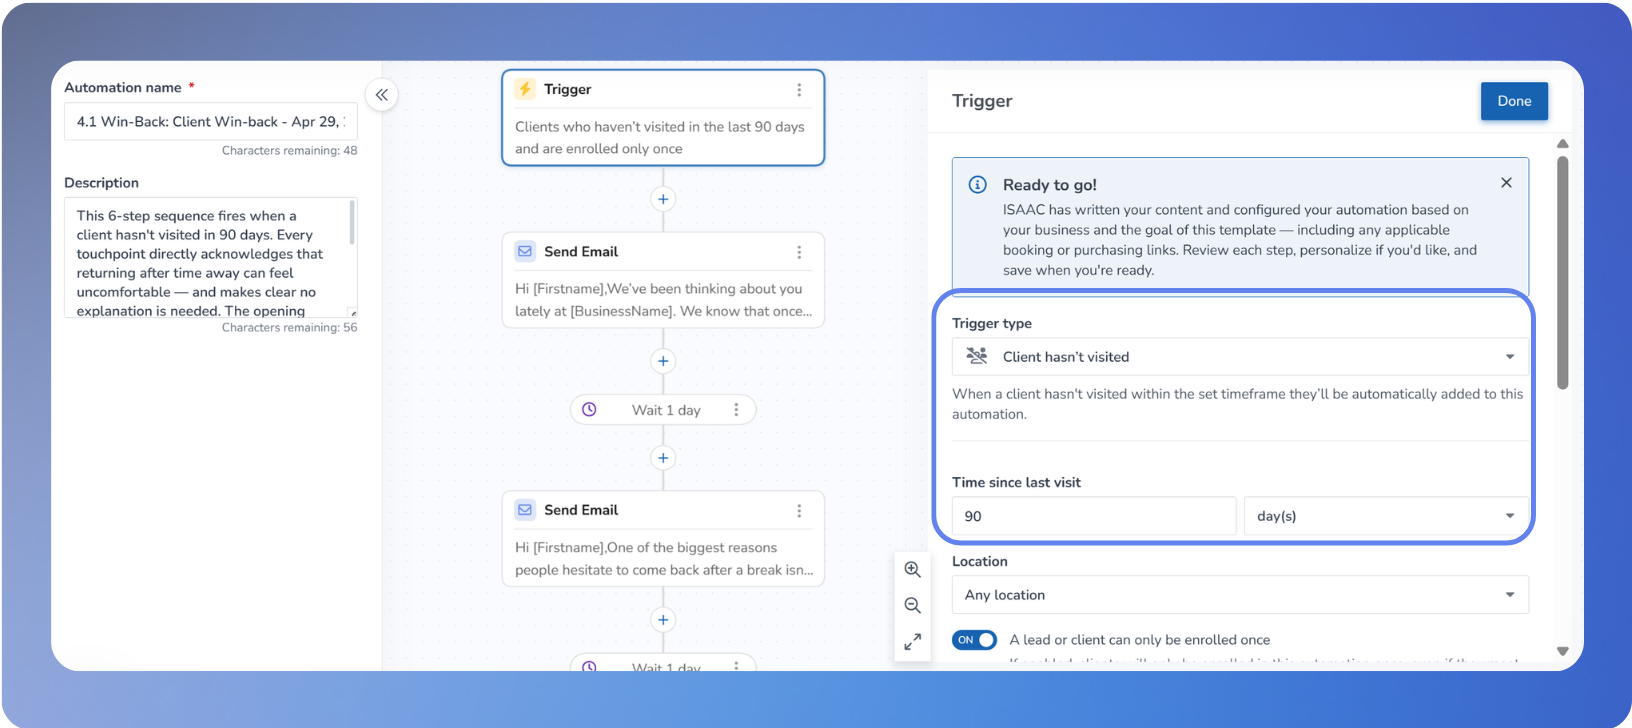
In the automation builder, select the Trigger from the center panel.
Scroll down and locate the Time Since Last Visit section.
The default is set to 90 days, but can be changed.
Time since last visit option | What it targets | Best for |
|---|---|---|
30 days | Clients who haven't visited in over a month | Most businesses, broad reach |
60 days | Clients who haven't visited in over two months | Businesses with high visit frequency |
90 days (default) | Clients who haven't visited in over three months | Businesses with high visit frequency |
Other settings Number - Timeframe | Customize the timeframe by choosing days, months, or years. | Businesses focused on recovering lapsed memberships |
To review the audience filter:
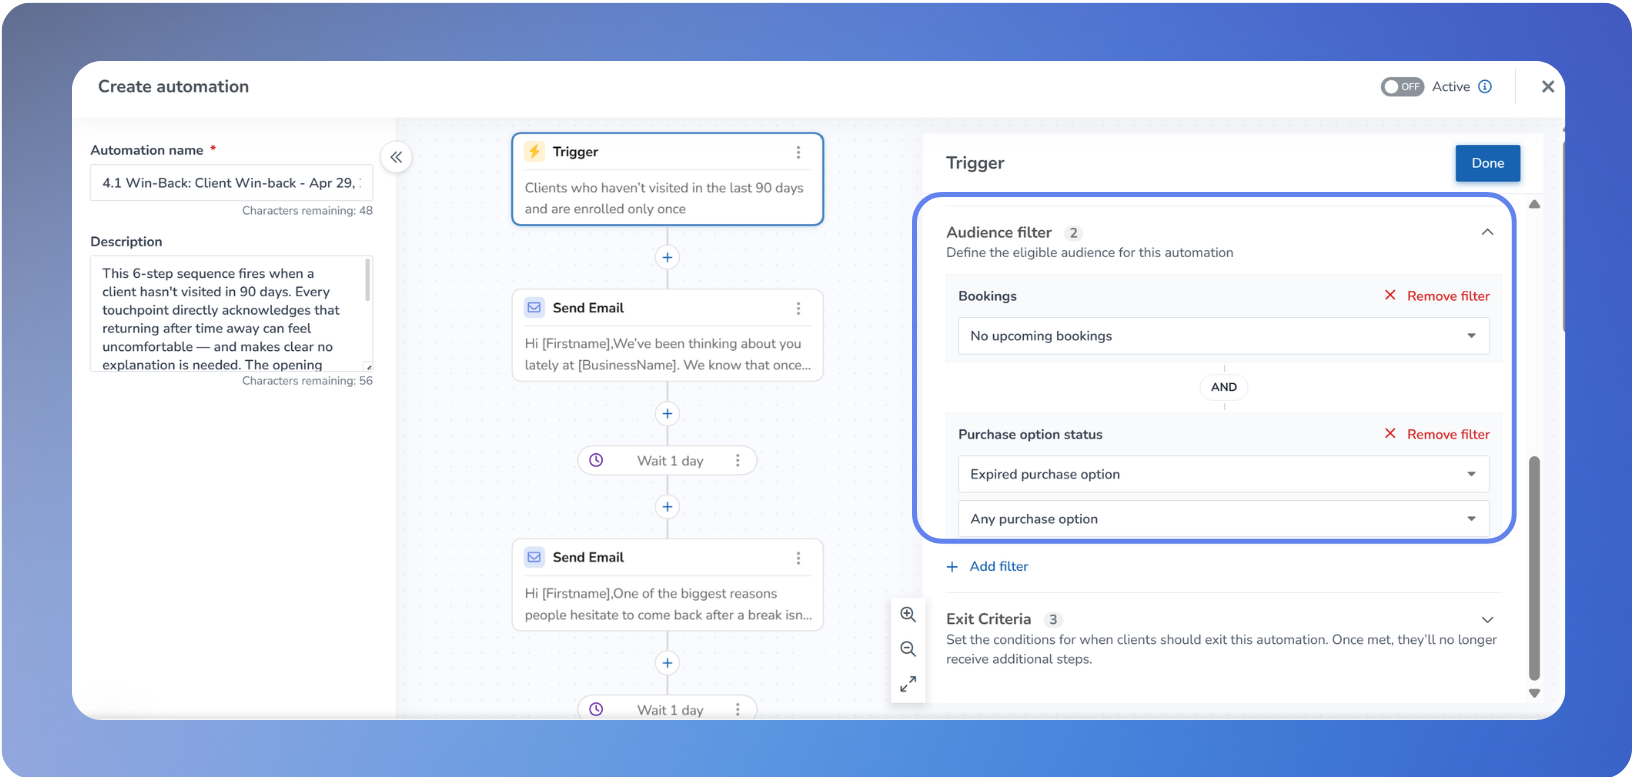
In the automation builder, select the Trigger from the center panel.
Scroll down locate the Audience section.
Confirm the filter targets lapsed clients. A typical setup uses:
Bookings: No upcoming bookings option
Purchase Option Status: Expired purchase option or Any purchase option
If the audience filter is not set, or you want to adjust it, see the audience filter options below.
Note: The Purchase Option Status filter controls which clients are targeted based on their membership history. Expired purchase option targets clients who previously purchased but whose Purchase Option has since lapsed. Any purchase option casts a wider net and includes clients regardless of purchase history. If you want to reach only clients who've purchased before, use Expired purchase option.
Review the exit criteria
Exit criteria control when a client is removed from the automation, such as when they book a visit or make a purchase. The pre-built win-back automation includes sensible defaults.
Common exit criteria for win-back automations include:
Client makes a purchase
Client books a visit
Client attends a service
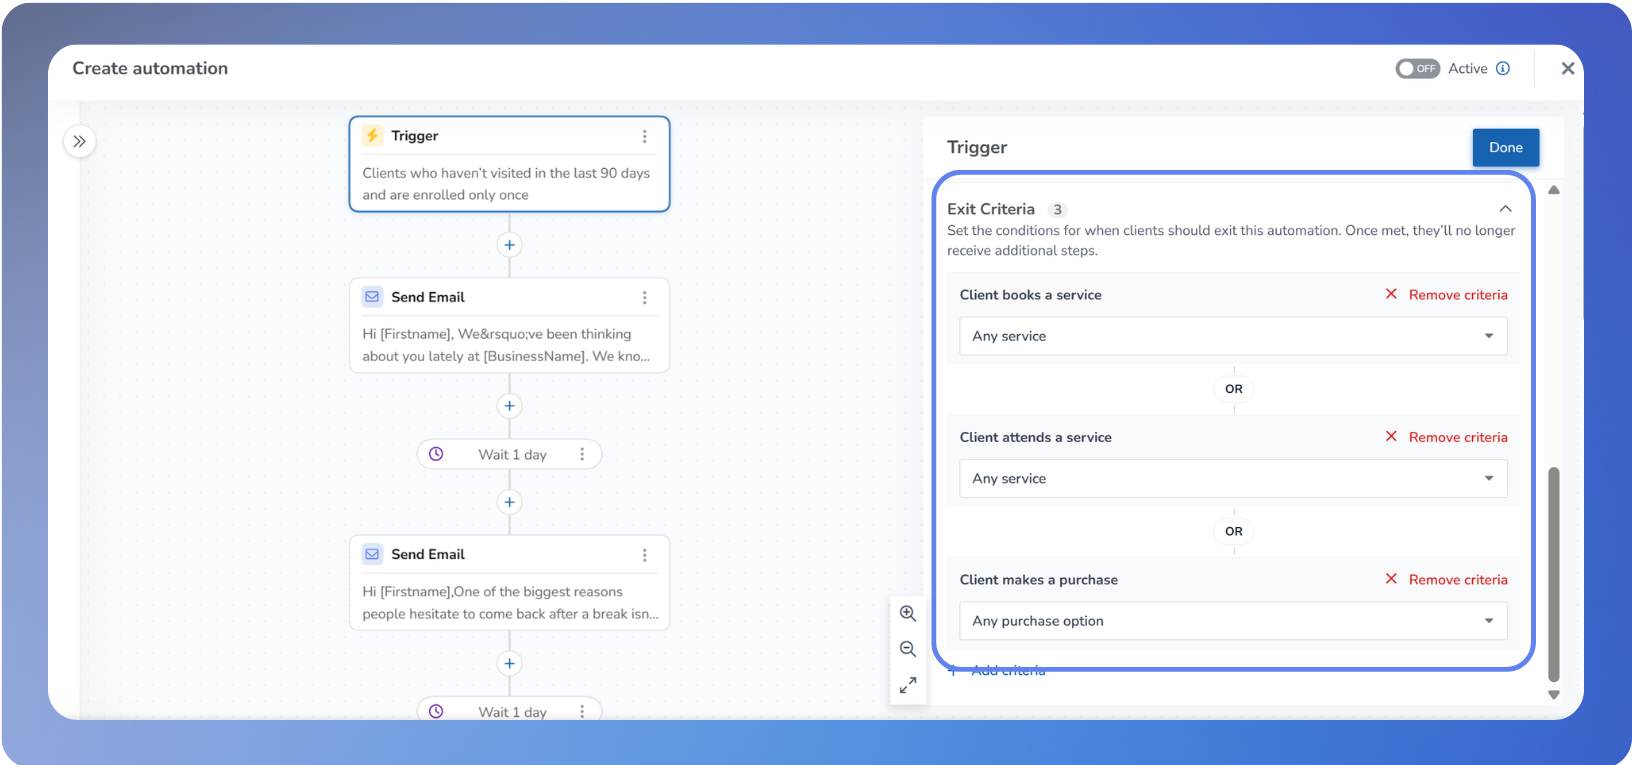
In the automation builder, select the Trigger from the center panel.
Scroll down to the bottom and locate the Exit Criteria section.
Confirm the filter targets lapsed clients. A typical setup uses:
Client Books a Service: Any service
Client attends a Service: Any service
Client makes a Purchase: Any purchase option
Additional Criteria: Press the +Add Criteria link to add any additional exit criteria to suit your business.
Review and customize the messaging
ISAAC AI personalizes the email and SMS content for your business when the template loads. The automation is ready to go as-is, but you can edit any step before activating.
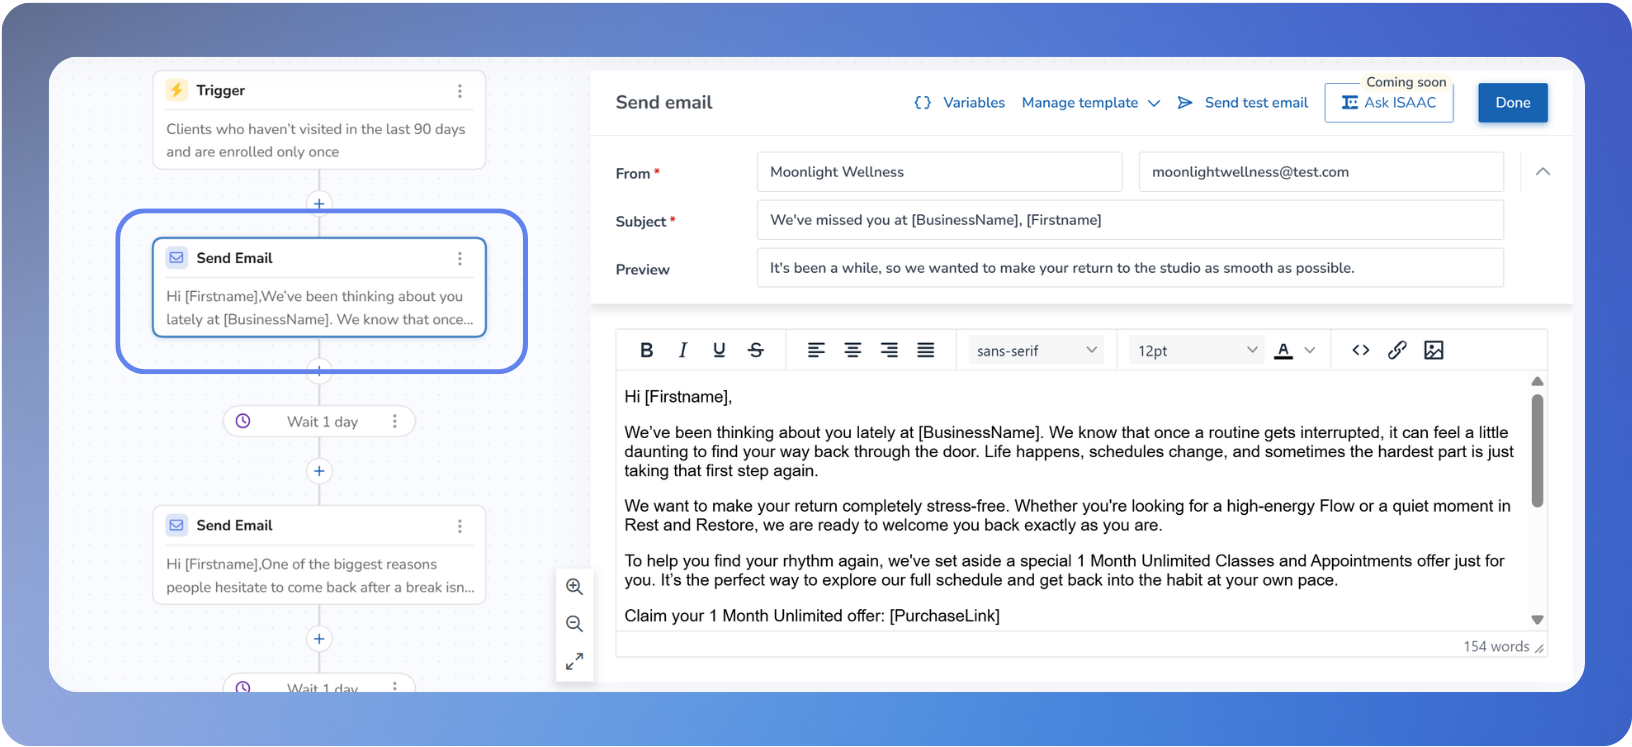
To review or edit a message step:
In the automation builder, click any Send Email or Send SMS step to open it.
Review the subject line, body copy, and any calls to action.
To make changes, click inside the content area and edit using the visual editor.
When you're done, click Save on the step.
Note: You don't need to write anything from scratch. The pre-built content is professionally written and personalized for your business. Only edit if you want to add a specific offer, adjust the tone, or add your own details.
Note: SMS steps require A2P 10DLC registration to send. If your SMS step shows as Skipped, you'll need to complete SMS verification first.
Activate the automation
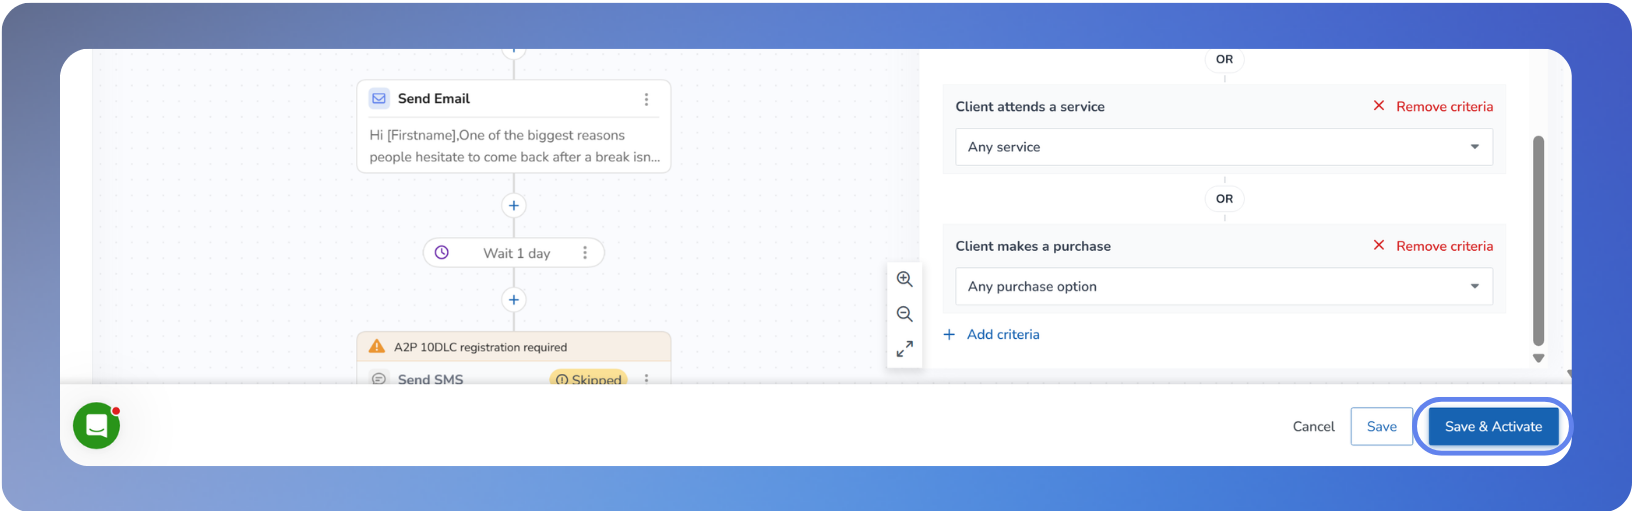
To activate your win-back automation:
When you've reviewed the audience, messaging, and exit criteria, click Save and activate button in the bottom right corner of the automation builder.
An activate prompt will be displayed. Press on the Save and activate button once more to confirm the activation.
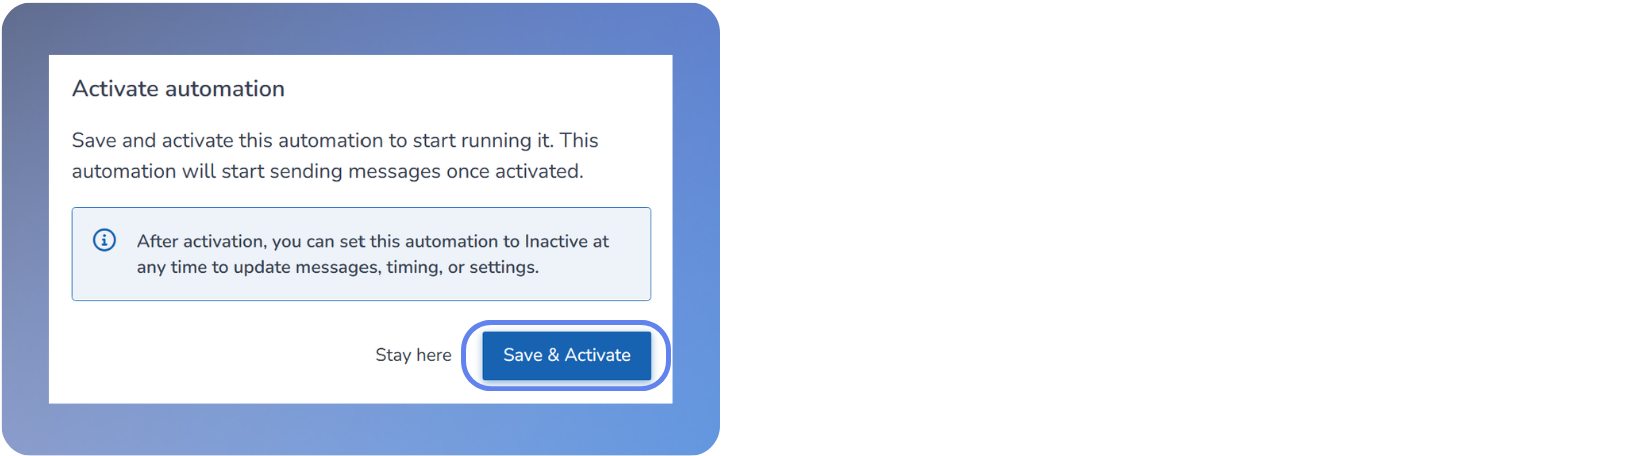
Your automation is now active. You can monitor performance from the Automations tab in Marketing Suite.
Note: Your automation must remain active to keep enrolling new lapsed clients. If you pause or deactivate it, clients already in the automation will complete their remaining steps. No new clients will be enrolled until you reactivate it.
Track your results
Once your win-back automation is active, you can monitor its performance from the Marketing Suite dashboard.
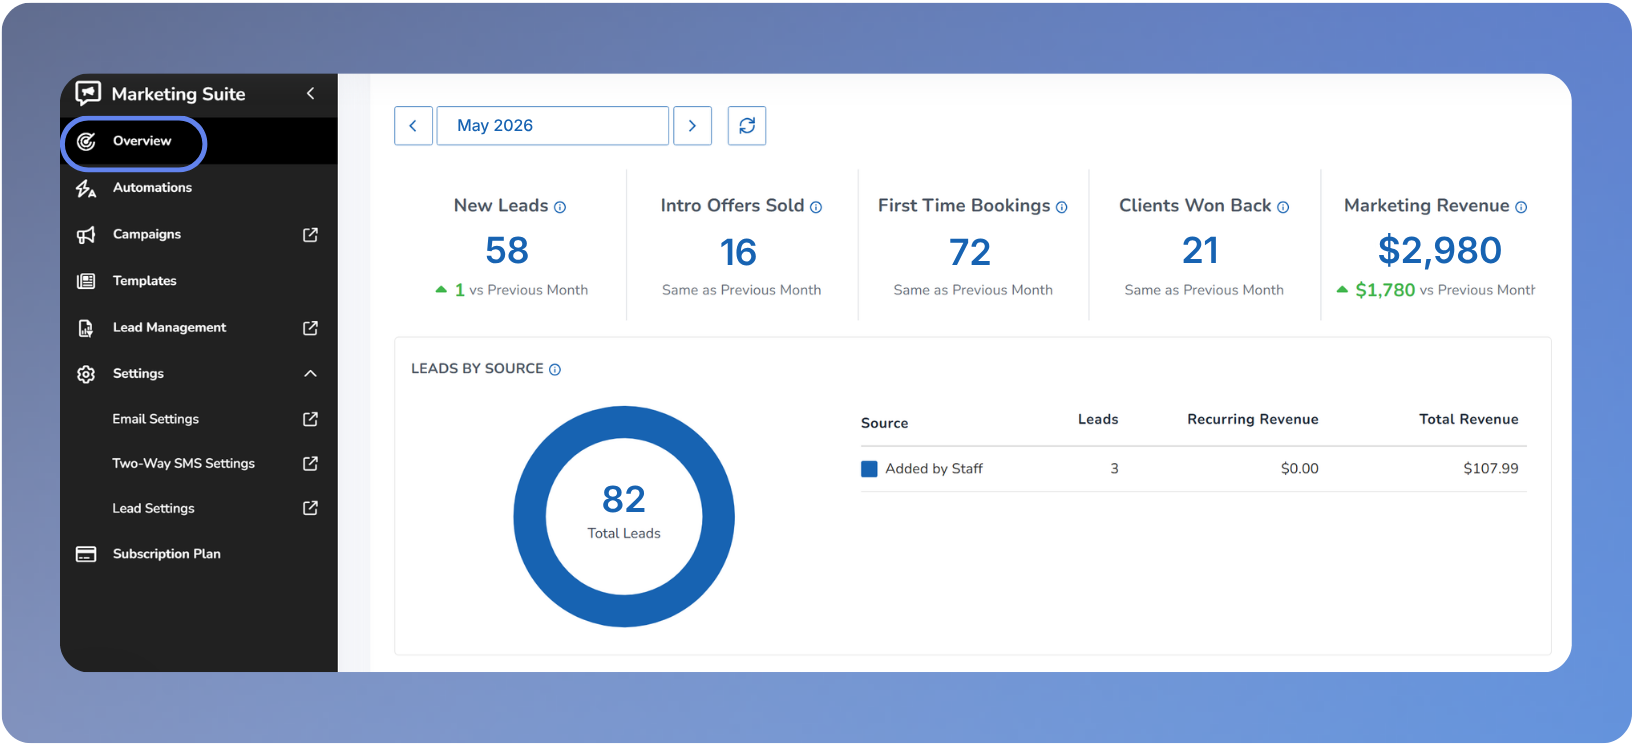
To view automation performance:
In Marketing Suite, click the Automations tab.
Find your win-back automation and click it to open the detail view.
Review the performance metrics, including sends, opens, clicks, bookings, and revenue generated.
Key metrics to watch:
Open rate: A healthy win-back open rate is typically 20 to 30 percent. If yours is lower, try adjusting your subject line.
Click rate: Measures how many recipients clicked a link in your message.
Bookings: The number of clients who booked a visit after receiving the automation.
Revenue: Total revenue attributed to the automation.
Next steps
Once your win-back automation is running, use these resources to explore what else Marketing Suite can do for your business.