
In this article, you'll learn how to set up an intro offer that guides new clients from purchase to their first booking.
If you have CAASI on your website, it can recommend your intro offer to visitors during a conversation and help them buy and book without having to navigate your site. Leads captured by CAASI are added to WellnessLiving automatically and can flow straight into your Marketing Suite automations.
Key tips
This setup drives revenue first by requiring clients to purchase before booking.
Keep your intro offer clearly labeled for first-time clients only to avoid misuse.
You have options to promote it: use widgets, direct links, or marketing campaigns depending on what works best for your business.
Only managers and above can complete this setup.
Each Lead Capture skin also has its own shareable direct link you can copy from the Embed Code tab. Use this link to share your lead capture form in emails, SMS messages, or social media bios anywhere you can't paste embed code. For more information, see Manage your Lead Capture Widget.
Before you begin
Make sure the following are in place before you start:
Your services are already created in WellnessLiving. You'll assign service access to the intro offer during setup.
You have access to your website or landing page to add the Lead Capture widget embed code if you choose to use one.
Guest purchases are off by default. You'll enable this as part of the setup to allow new clients to buy without creating an account first.
Automations require an active Marketing Suite subscription. For more information, see Manage your Marketing Suite subscription.
CAASI requires a separate subscription. To learn more, see Complete guide to CAASI.
Create an intro offer purchase option
Start by creating the purchase option your new clients will buy. This is the foundation of your flow.
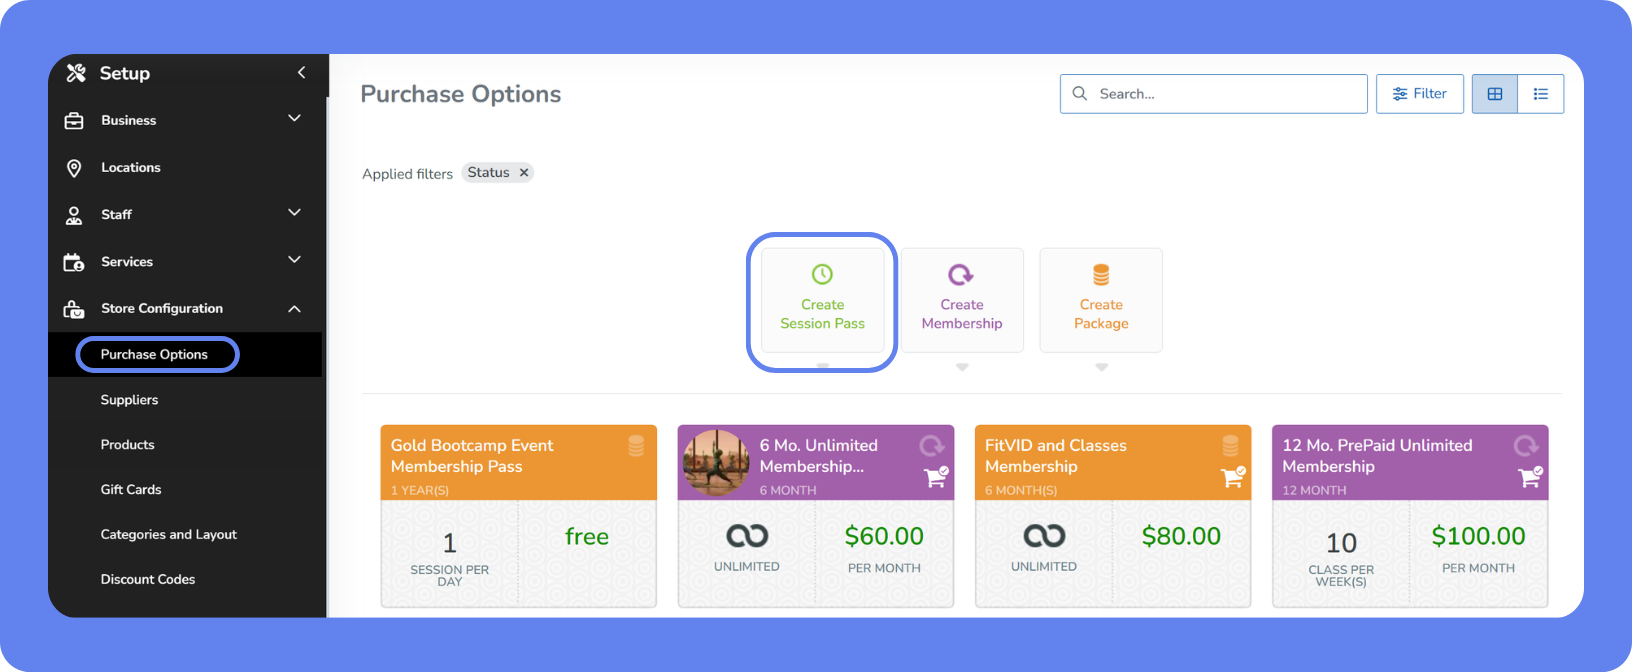
To create an intro offer purchase option:
Open the App Drawer then click View All > Setup > Store Configuration > Purchase Options.
Click Add Purchase Option.
Select the appropriate service type, for example, Classes.
Enter a name, for example, One Week Free or Intro Offer - One Week Unlimited.
Set your pricing. Enter a discounted price, or set the price to $0. This is a business decision based on what works best for your offer.
Set the visit limit. Select Unlimited visits, or enter a specific number of visits.
Set Activation Type to First Visit. This ensures the offer starts only when the client attends for the first time.
Set the Expiration Period, for example, one week or one month.
(Optional) Under Expiry, set what happens when the offer expires. By default, the pass does nothing when it expires. If you'd like clients to automatically convert to a regular membership or pass, you can configure that here.
Assign a Store Category to organize the offer in your store.
Under Availability, set the availability to Introductory Offer. This restricts the offer to clients who haven't purchased anything before.
Under Service Access, configure which services the offer covers. By default, access is set to all classes. You can restrict this to specific services, for example, beginner classes only.
Click Save.
Enable guest purchases
Allow new clients to purchase without creating an account first. This reduces friction and increases conversions.
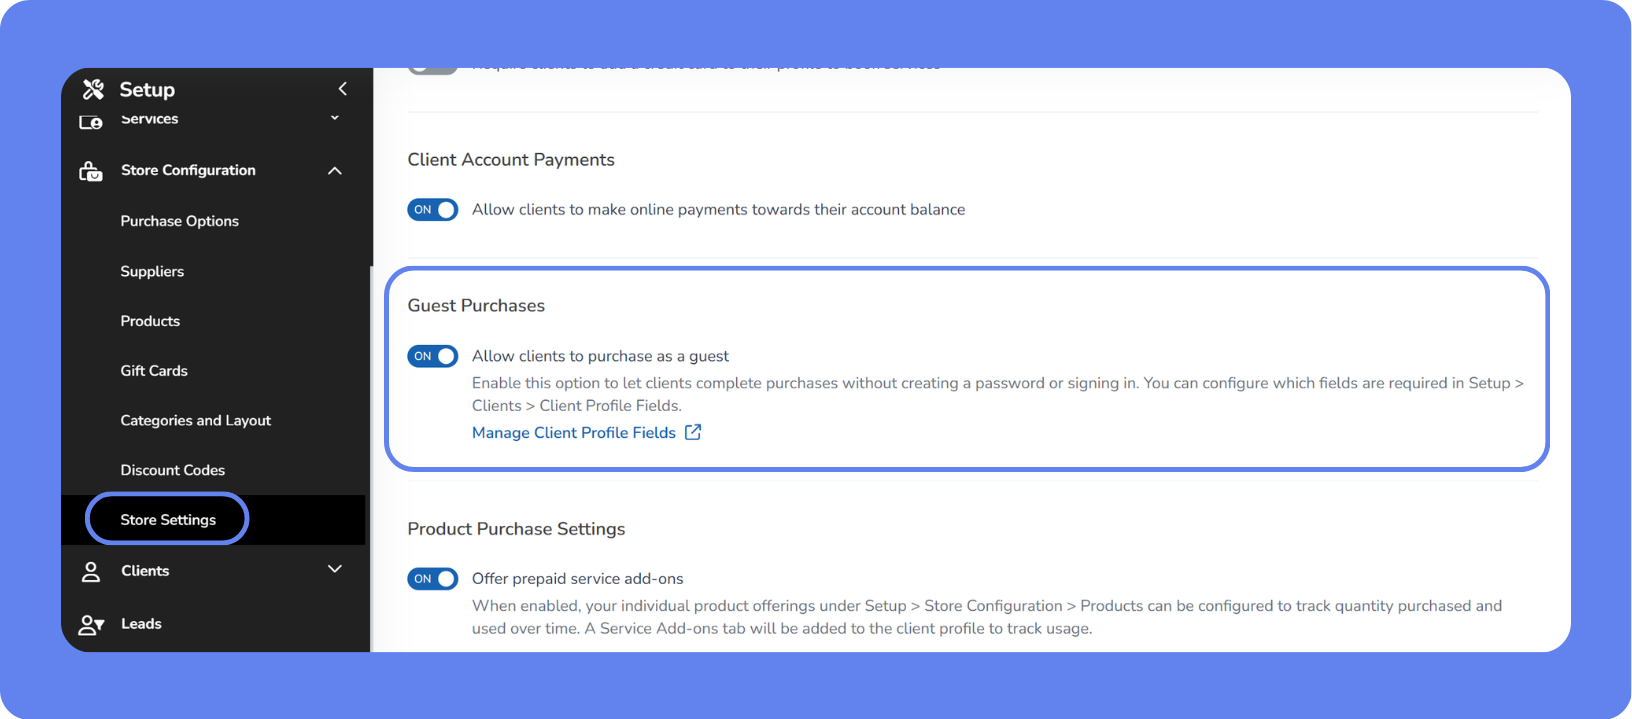
To enable guest purchases:
Open the App Drawer then click View All > Setup > Store > Store Configuration.
Click Store Settings.
Scroll down and set Allow guest purchases to ON.
Click Save.
Get the direct checkout link
Once your intro offer is created, generate a link you can share with clients.
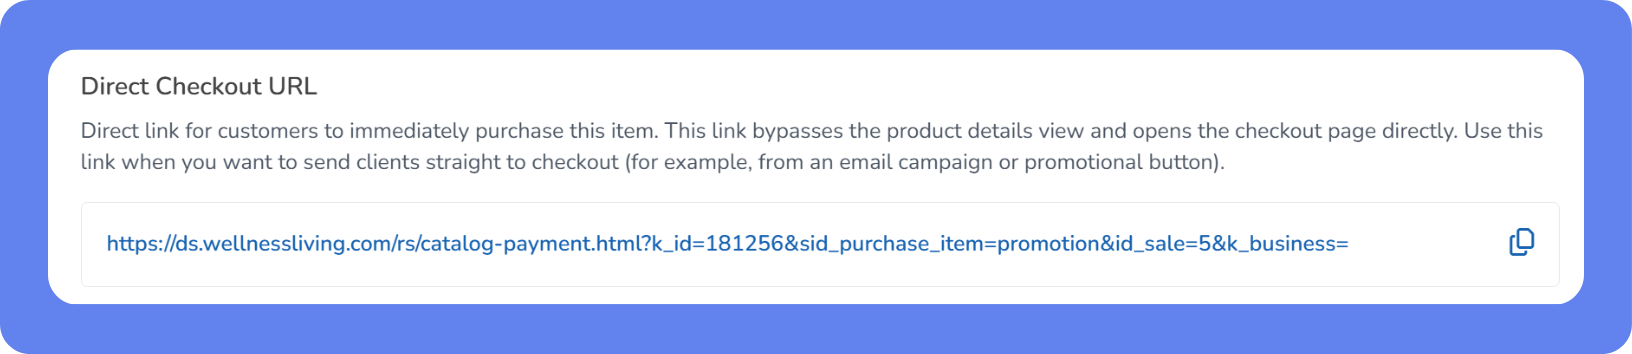
To get the direct checkout link:
Open the purchase option you just created.
Scroll to the bottom of the page.
Copy the Direct Checkout URL. This is the link clients use to buy your intro offer. The product details URL is also listed here. Make sure you copy the Direct Checkout URL specifically.
(Optional) Create a Lead Capture widget with redirect
If you want to collect lead information before sending clients to checkout, use a Lead Capture widget.
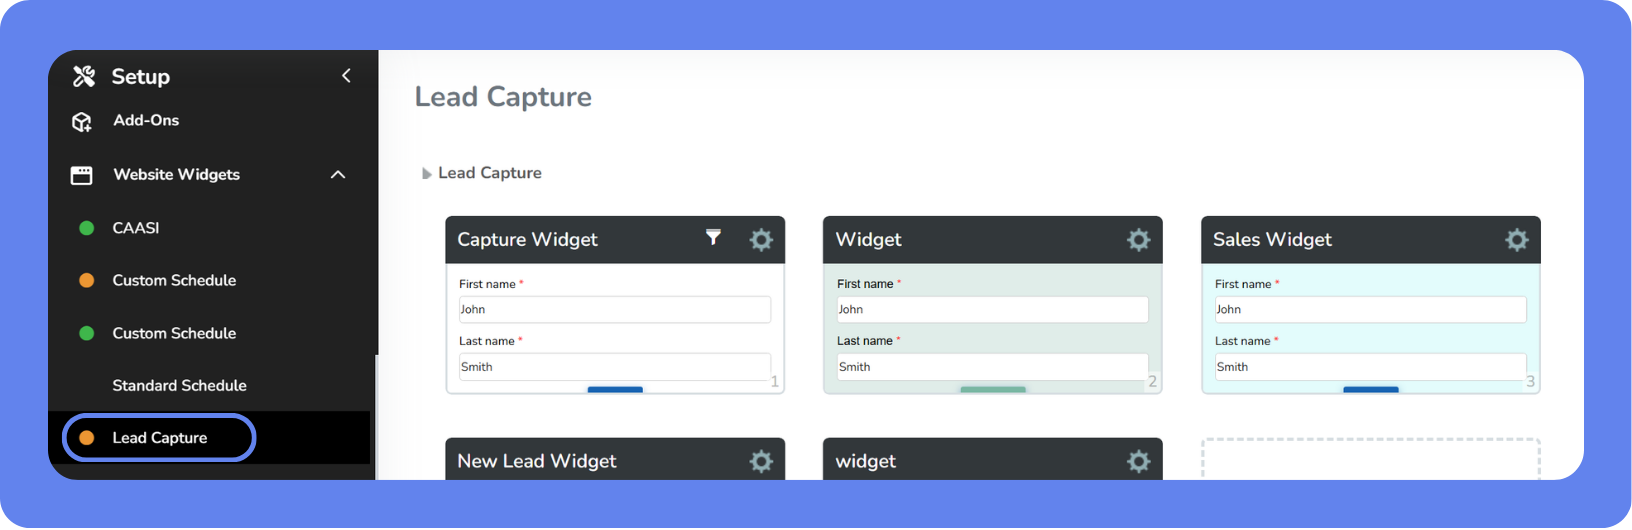
To create a Lead Capture widget with redirect:
Open the App Drawer then click View All > Setup > Widgets > Lead Capture Widgets.
Click Add Lead Capture Widget.
Enter a name for the widget.
Make sure no free purchase option is applied to the widget. This flow is focused on driving purchases, not free redemptions.
Turn off the welcome email if you're using other marketing workflows to follow up with new leads.
Under Embed, paste your Direct Checkout URL in the Redirect URL field. This sends clients to purchase the intro offer immediately after submitting the form.
Set the redirect to open in the same tab.
Click Save.
Copy the embed code and add it to your website.
Share the offer and get clients booking
Once a client purchases the intro offer, make it easy for them to book right away. There's no automatic redirect after purchase, so you'll want to make your booking page easy to find.
Here are the most effective ways to do this:
Add your schedule widget to your website or a dedicated landing page so clients can book immediately after purchasing.
Include your booking page link in post-purchase confirmation emails so clients can book while they're still motivated.
Share the Direct Checkout URL in email or SMS campaigns to drive purchases directly from your marketing.
Here's how this might look in practice:
A yoga studio embeds their schedule widget on a "New Student" landing page. Their intro offer checkout link goes in the post-purchase confirmation email. They run a monthly email campaign through Marketing Suite to leads who haven't purchased yet, and their CAASI chatbot recommends the intro offer whenever a visitor asks about trying a class. Multiple touchpoints, all driving to the same offer, with no manual follow-up needed.
Next steps
Once your intro offer is live, activate the 1.7 Lead Nurture: Intro Offer Welcome pre-built automation in Marketing Suite. It sends a sequence of emails and SMS messages to new leads promoting your offer automatically.
You can also activate the 2.2 New Member Love automation to welcome clients after they purchase, encourage them to book during the trial period, and nudge them toward a full membership before the offer expires.
To access pre-built automations, open the App Drawer then click View All > Marketing Suite > Automations > Create Automation > Pre-built automations.
Once everything is in place, you're ready to start bringing in new clients.