
A free consultation or facility tour is one of the most effective ways to convert a curious visitor into a paying client. If you have CAASI installed on your website, it's already doing a lot of this work: chatting with visitors, collecting their contact info, and booking consultations directly from the chat.
Leads captured by CAASI are added to WellnessLiving automatically and can flow straight into your Marketing Suite automations. In this article, you'll learn how to set up the appointment type and Lead Capture Widget that complete the picture.
CAASI requires a separate subscription.
To learn more, see Complete guide to CAASI.
Key tips
This flow combines a Lead Capture Widget with a booking experience to guide clients step by step.
Keep required fields minimal to reduce friction and increase bookings.
For follow-up, you can use built-in appointment notifications or a Marketing Suite automation. Notifications send booking confirmations and reminders automatically. If you want a multi-step sequence (a welcome email, a day-before SMS, and a post-visit review request, for example), use the First Visit Follow-Up pre-built automation in Marketing Suite instead.
Only managers and above can complete this setup.
Before you begin
Make sure the following are in place before you start:
Staff schedules and availability are set up in WellnessLiving. If staff availability isn't configured, clients won't see any open time slots when booking.
You have access to your website or landing page to add the Lead Capture Widget embed code if you choose to use one.
Set up a free consultation or tour appointment
Your appointment type is the centerpiece of this flow. Setting it up correctly means new clients get a clear, trustworthy first impression before they've even walked through the door.
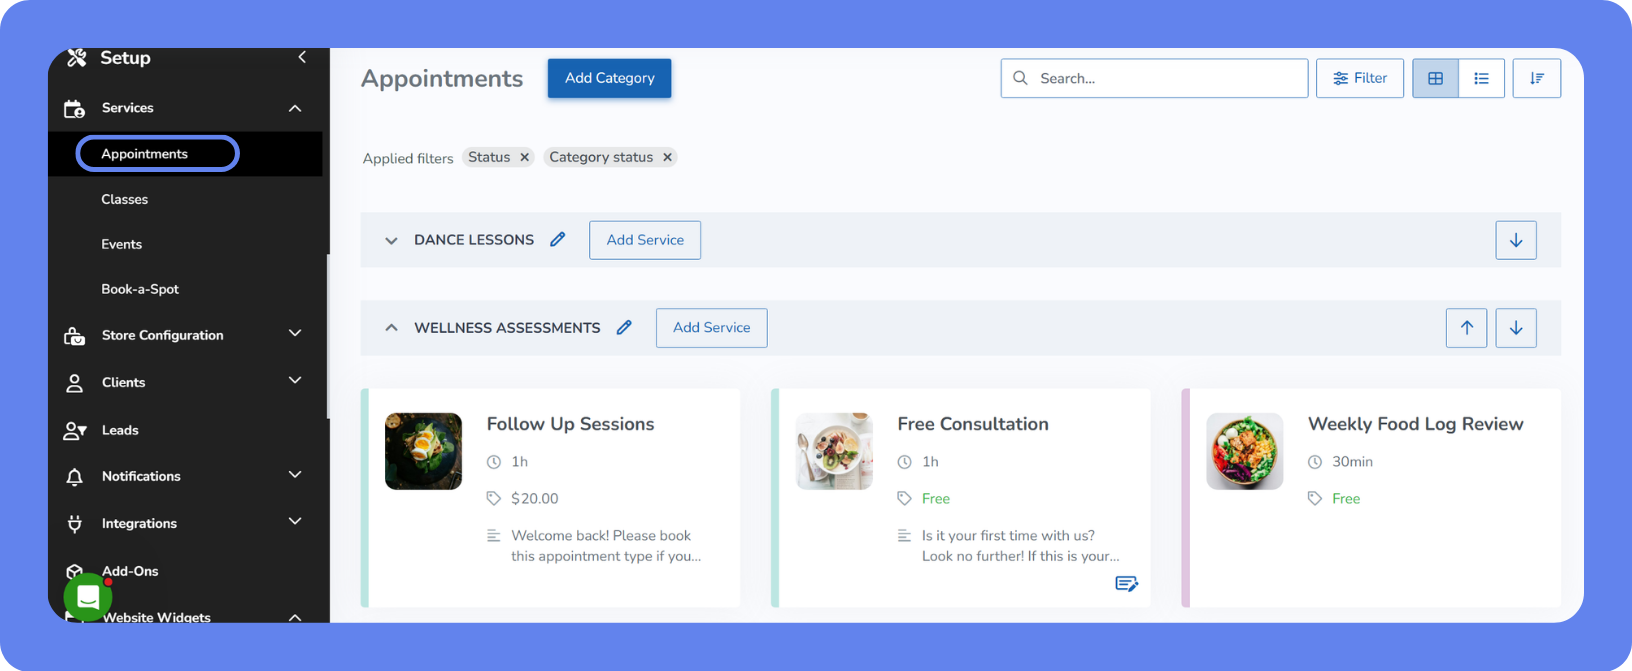
To create a free consultation or tour appointment:
Open the App Drawer then click View All > Setup > Services > Appointments.
You may want to create a new Category for your offers. Click Add Category and create a name, for example Offers.
Navigate to a category and click Add Service.
Enter a name for the appointment, for example, Free Consultation or Facility Tour.
Add a description explaining what clients can expect. Write a clear, detailed description.
Note: Marketing Suite's AI copywriter uses this description when generating email and campaign content for this service. The more detail you add here, the better your automated messaging will be.
Under Duration, set the Service Length of time for the appointment.
There are two duration settings on this page: the service length (how long the appointment runs) and the booking interval (what time slots appear as available on the calendar).
For example, if the appointment is 30 minutes, set the booking interval to 30 minutes as well so available slots appear at consistent intervals.
Under Pricing, set the pricing type depending on your service offering:
If the session will be complimentary, set the type to Free.
If the session will have a cost, set the type to Fixed and then set a Service Price in dollars ($).
Make sure clients can book the appointment online.
Under Staff Settings, assign the staff members who will provide the consultation.
(Optional) Remove staff selection from the booking flow if you don't want clients choosing a specific staff member.
Set the appointment delivery method:
Select In-person for facility tours.
Select Virtual if using Zoom or another platform.
Set the Booking Interval to match the appointment duration, for example, 30 minutes.
Click Save.
Tip: Once your consultation appointment is set up, you can activate the Free Consultation pre-built automation in Marketing Suite. It's a ready-to-go email and SMS sequence that nurtures new leads toward booking.
To access it, open the App Drawer then click View All > Marketing Suite > Automations > Create Automation > Pre-built automations.
Configure booking policies
Every extra step in the booking process is a chance for a potential client to give up. Enabling guest booking and keeping required fields short removes the barriers that cost you bookings.
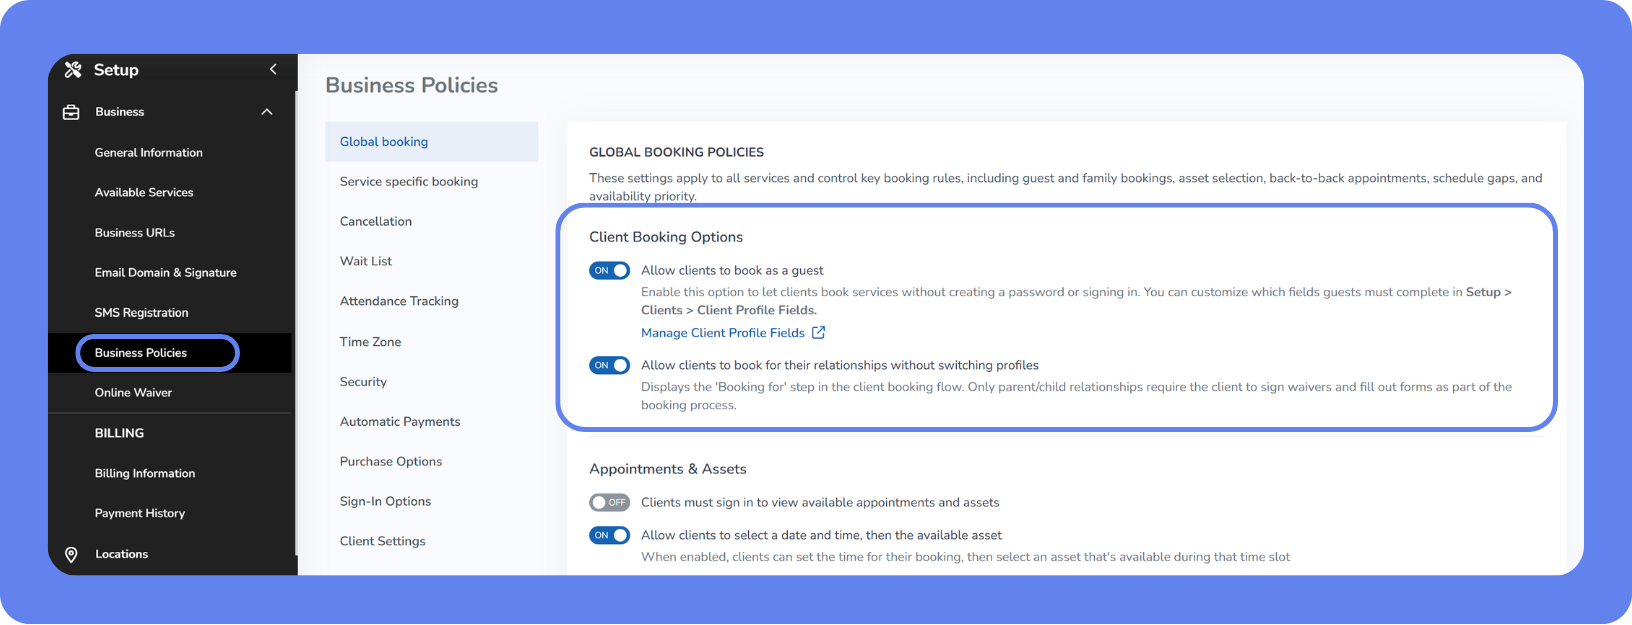
To configure booking policies:
Open the App Drawer then click View All > Setup > Business > Business Policies.
Set Allow guest booking to ON. This removes the need for clients to create an account before booking.
Click the link to manage required profile fields.
Keep only these fields required: First Name, Email, and Phone. The fewer fields you require, the more likely clients are to complete the booking.
Get the direct booking link
Once your appointment is set up, generate a link you can share with clients.

To get the direct booking link:
Open the consultation or tour appointment.
Scroll to the bottom of the page.
Copy the Direct Booking URL.
This link takes clients straight to your booking page with no extra steps.
Create a Lead Capture Widget with redirect
The Lead Capture Widget is where your marketing and your booking system connect. A client fills out the form, gets redirected to your booking page, and your follow-up automation kicks in automatically.
You capture the lead and confirm the appointment without lifting a finger.
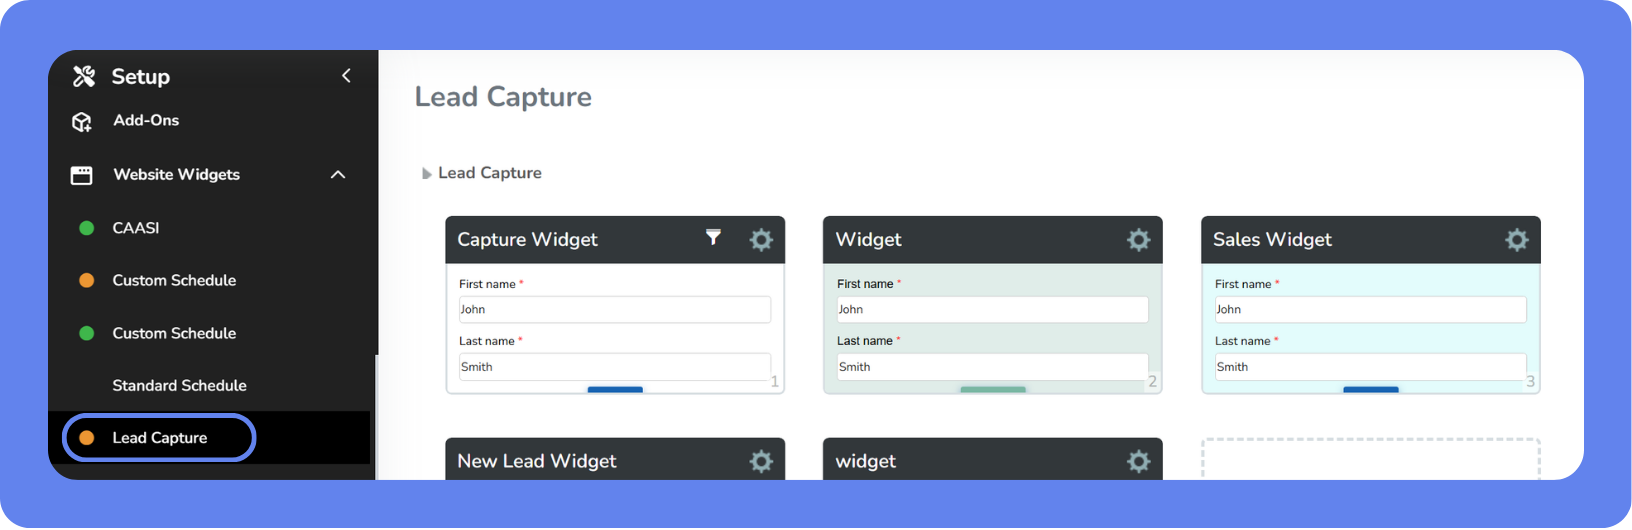
To create a Lead Capture Widget with redirect:
Open the App Drawer then click View All > Setup > Widgets > Lead Capture Widgets.
Click Add Lead Capture Widget.
Enter a name for the widget.
Keep the form simple. Include only First Name, Last Name, and Email.
Under Embed, paste your Direct Booking URL in the Redirect URL field.
Set the redirect to open in the same tab. This creates a seamless transition from form submission to booking.
Click Save.
Copy the embed code and add it to your website.
Set up notifications or automations
After a client books, follow up automatically so they know what to expect. Choose the option that fits your workflow.
Option 1: Appointment notifications
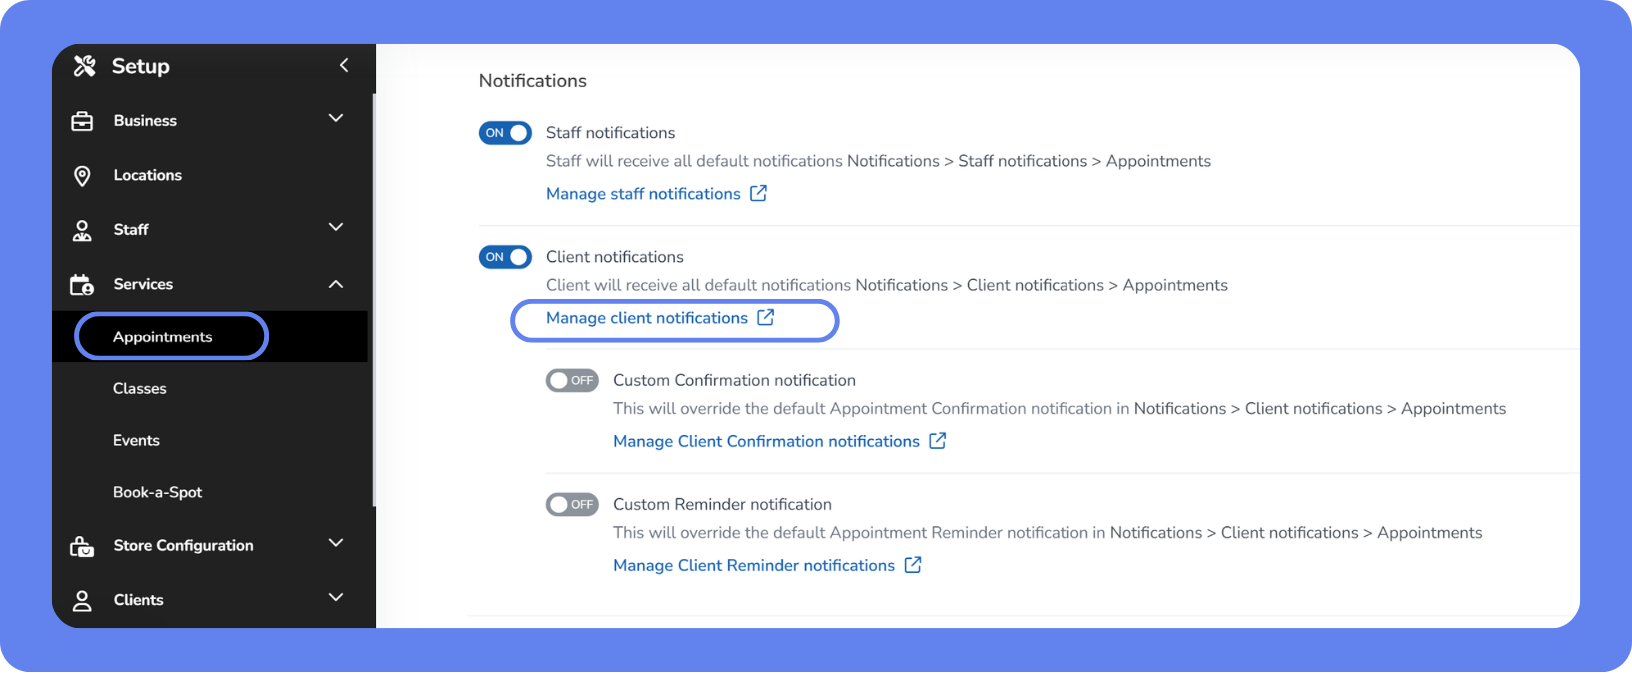
To set up appointment notifications:
Open the consultation or tour appointment.
Enable confirmations and reminders in the appointment settings.
Include details such as what to expect during the visit, what to bring, and arrival instructions.
Option 2: Marketing Suite automation
If you have Marketing Suite, automations let you build a follow-up sequence that runs on its own. When a client books their consultation, they automatically receive a welcome message, a reminder before their visit, and a follow-up afterward. This keeps new leads warm without any manual effort from your team.
To set up a Marketing Suite automation:
Open the App Drawer then click View All > Marketing Suite > Automations.
Click Create Automation.
Choose Start from Scratch.
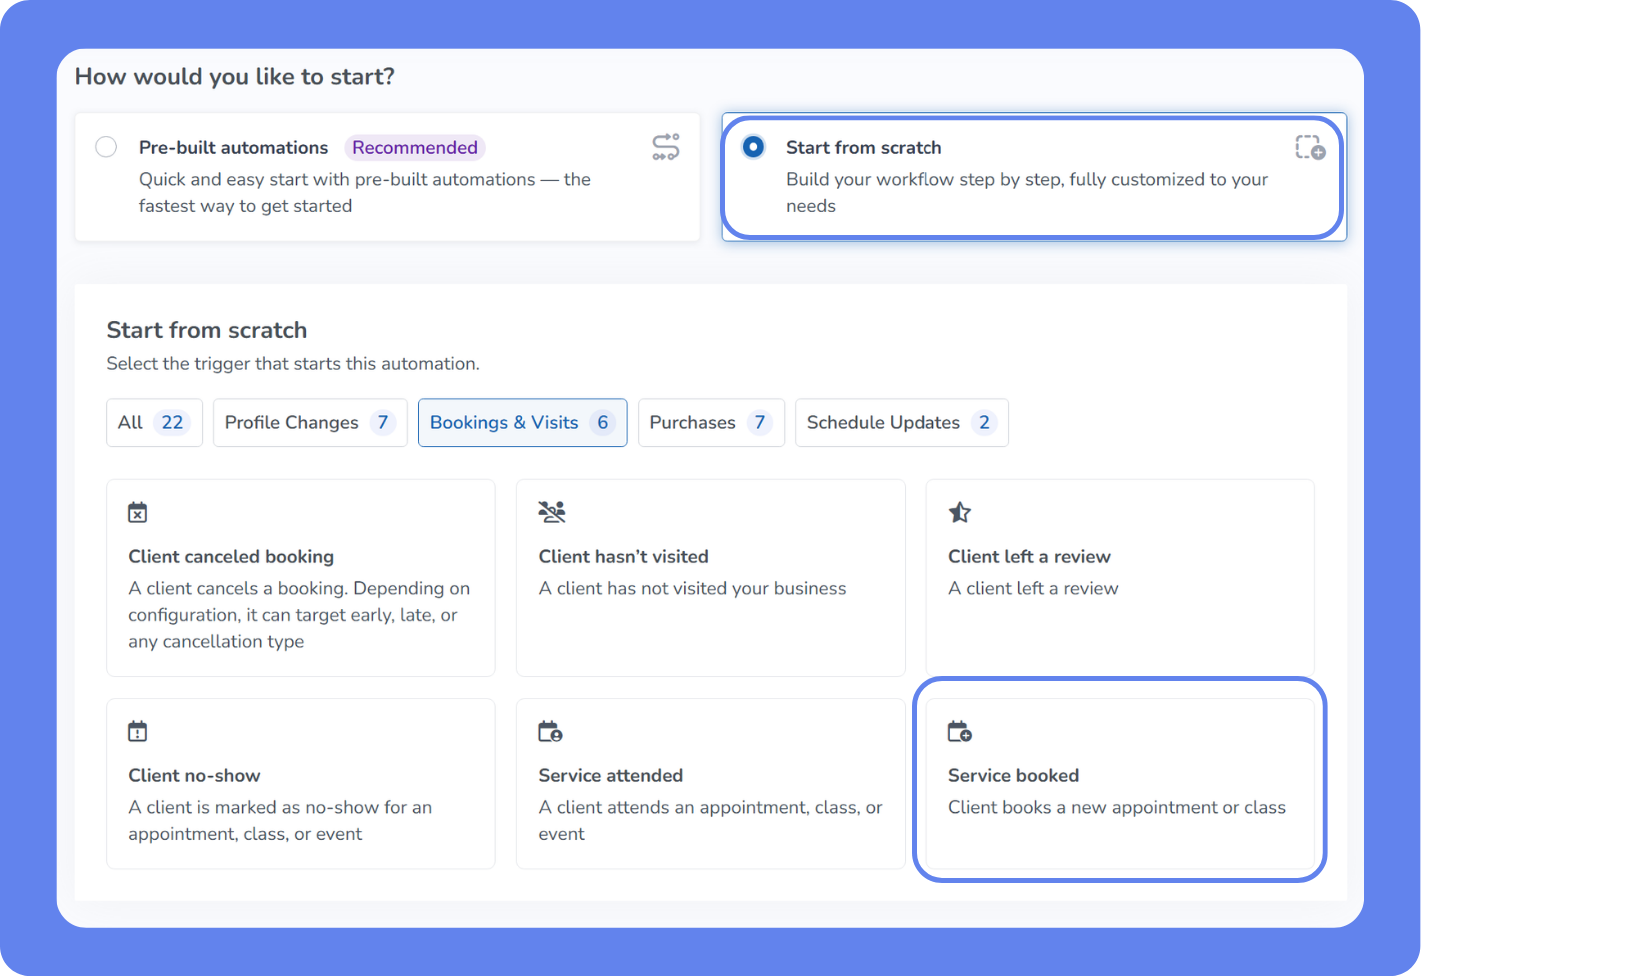
Select Service Booked as the trigger.
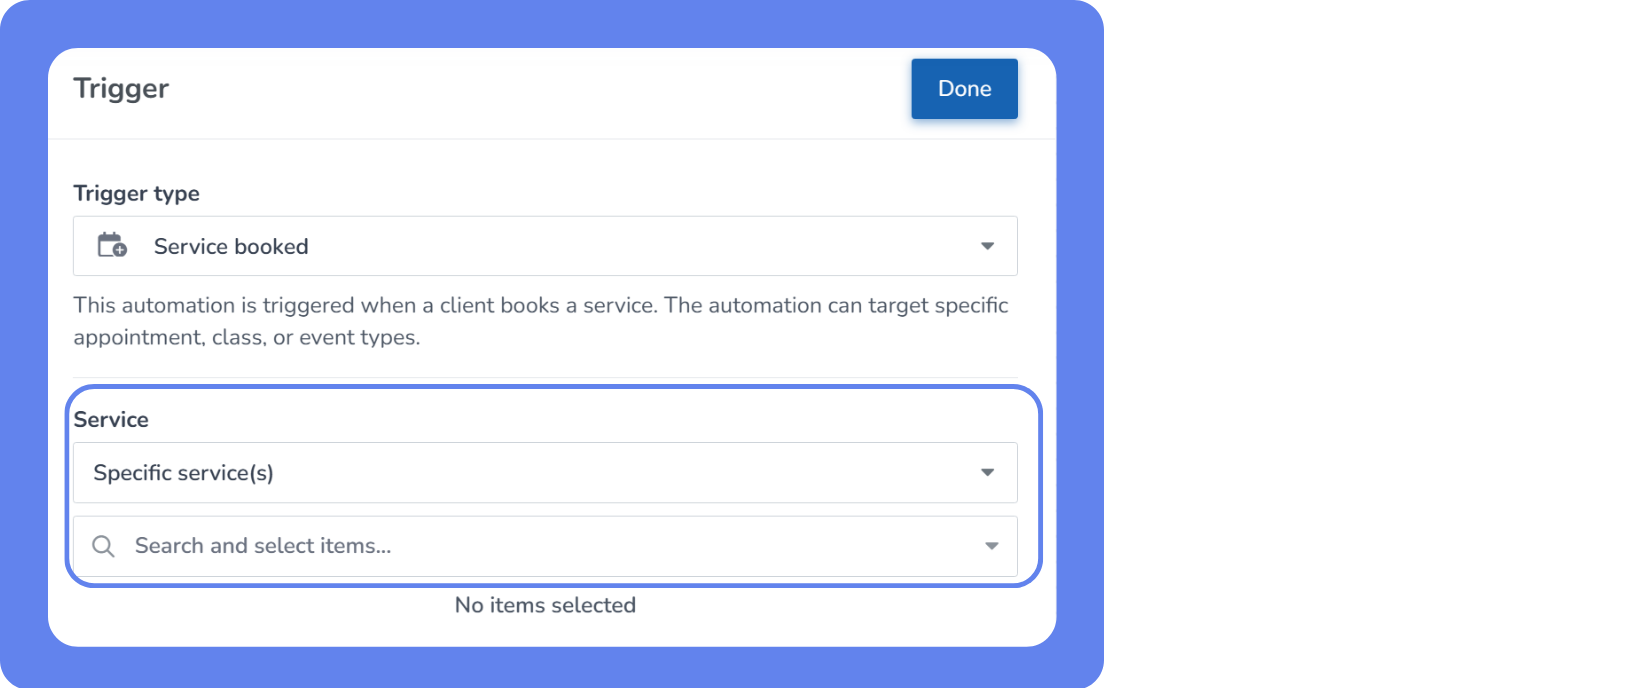
Choose your consultation or tour appointment.
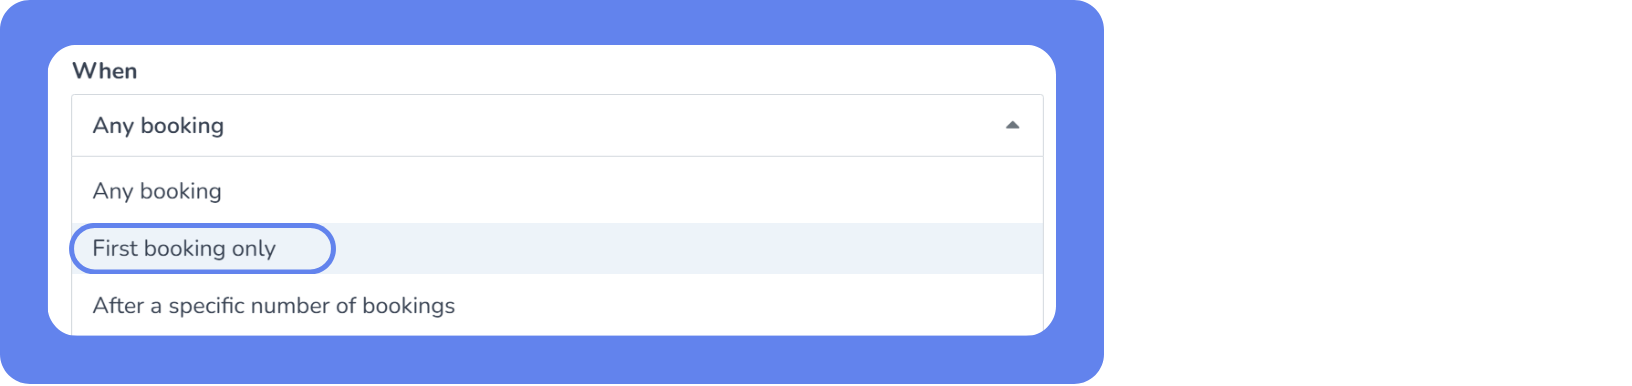
Set the trigger to apply to first-time bookings only.
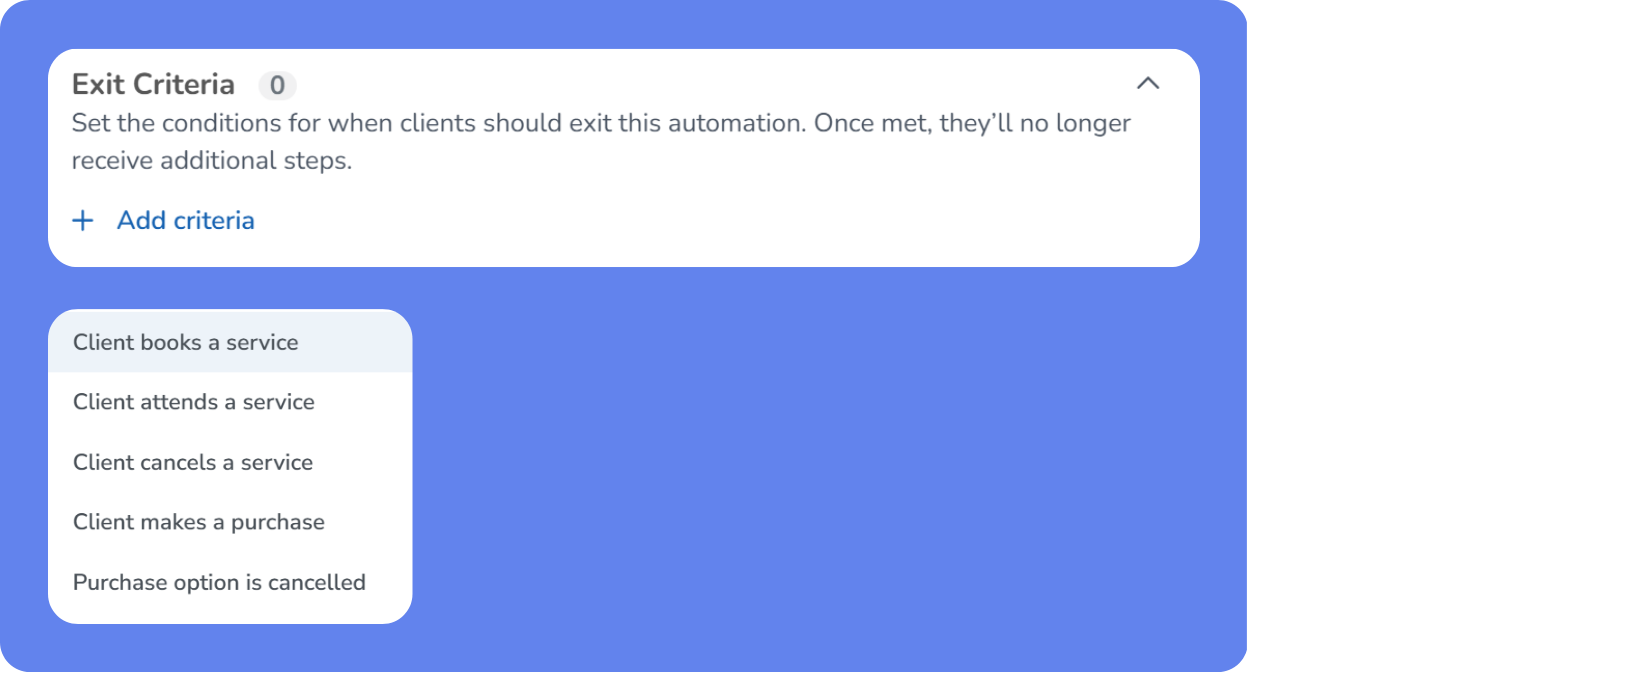
Add exit criteria:
Client attends the service.
Client cancels the service.
Add email or SMS steps as needed.
Click Save.
Next steps
With your flow live, every visitor to your site has a path to becoming a booked client. Use the resources below to keep building on what you've set up.