
Create, modify, or duplicate your memberships. You can also modify a membership that an individual client has already purchased to provide flexibility for clients with specific needs.
Key tips
A new membership can't have the same name as an existing one, including hidden memberships. To reuse a name from a deactivated membership, rename the deactivated one first.
When you modify an imported membership with a fixed payment schedule, upcoming payments won't be automatically recalculated. Adjust the client’s payment schedule manually from their profile page using Reset to previous.
Changes to a Purchase Option’s global settings are applied to all expired, canceled, inactive, and deactivated Purchase Options. However, Purchase Options with these statuses won’t be reactivated, even if the global changes affect auto-renewal or conversion settings.
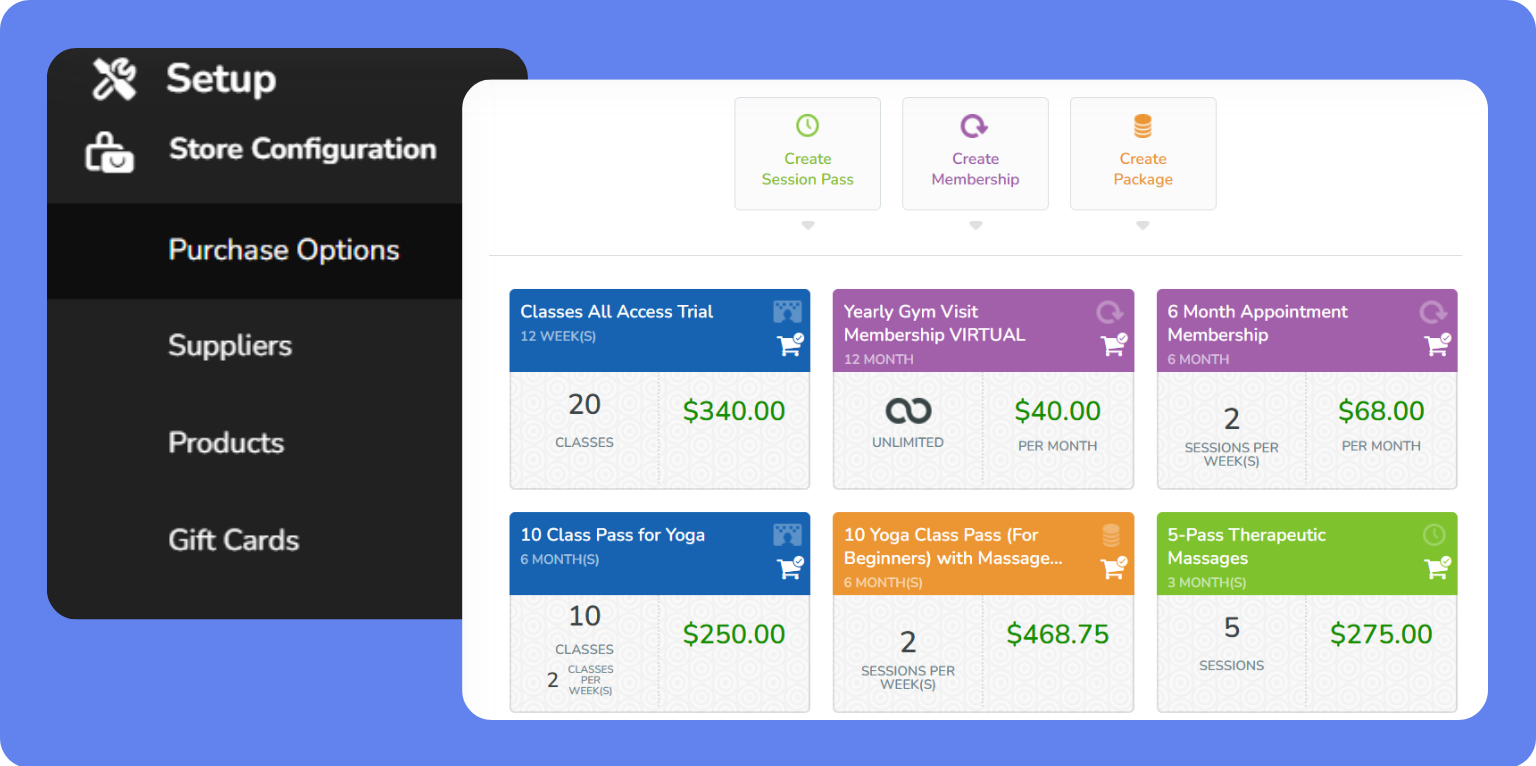
Create or modify a membership
To create or modify a membership:
Open the App Drawer
 then click View All > Setup > Store Configuration > Purchase Options.
To create a membership, click Create Membership and select the type of Purchase Option Service Category.
Only one service category can be chosen for a membership. To include multiple service types, create a package instead.
Account tab memberships add monetary value to a client’s account balance each membership period.
To modify a membership, select the membership. Search or filter the list to easily find the membership.
Configure or modify the membership settings as required.
Click Save.
All your current settings are applied to past purchases. You can exclude some changes, see below:
Set Apply to client purchases that have been edited to ON so that the memberships that were individually edited for one or more clients are updated.
Set Apply current price [price] to past purchases to ON so that memberships sold to clients are updated.
The number of clients who are affected by the changes is displayed. Click Open
 to view the affected clients in more detail in the All Clients Report.
To view a list of the changes to the membership, click Show summary of changes.
After making your selections, click Update.
Set up guest passes for a membership
If you manage gym visit memberships, you can allow members to invite guests to visit your business. Guests can check in for a gym visit for free, using the rules and limits you configure here. This is a great way to help members bring in friends and drive new client conversions without any manual work from your front desk.
Before you can assign a guest pass to a membership, you must first create a guest pass.
To set up guest passes for a membership:
Open the App Drawer
 then click View All > Setup > Store Configuration > Purchase Options.
Select the membership you want to configure, or create a new one with a gym visit service category.
Under Guest Passes, set the Include Guest Passes in this membership option to ON.
Under Included Guest Pass, select a Guest Pass Purchase Option from the dropdown. The dropdown shows gym visit-type Guest Pass Purchase Options only. Only one Guest Pass Purchase Option can be assigned per membership.
Under Allowance Type, select how guest passes are issued:
Select Limited to issue a set number of guest passes per billing or renewal cycle. Enter the number of passes to issue.
Select Unlimited to give members unlimited guest passes for the membership period. In the Per day limit field, enter the maximum number of guest passes a member can use in a single calendar day (minimum: 1, maximum: 99).
If Limited is selected, choose when guest pass availability resets:
Per billing cycle – Passes reset each time a payment is processed.
Per auto-renewal – Passes reset each time the membership renews.
Click Save.
What happens when you disable guest passes
If you set the Include Guest Passes in this membership option to OFF on a membership that previously had it enabled, a confirmation popup will appear. Disabling guest passes stops new passes from being issued to members on this membership. Any passes members have already received remain active and usable until the end of their current billing cycle.
If you change the guest pass configuration, such as reducing the quantity, the change takes effect at the start of the next billing or renewal cycle and doesn't affect passes that have already been issued.
Duplicate a membership
To duplicate a membership:
Open the App Drawer
then click View All > Setup > Store Configuration > Purchase Options.Click the membership that you want to duplicate. Search or filter the list to easily find the membership.
On the bottom-right, next to Save and Cancel, click Duplicate. A copy of the membership named Copy of [name of existing membership] appears in your list of Purchase Options.
On the Purchase Options page, select the duplicated membership from the list.
Modify the duplicate’s membership settings as required.
Click Save.