
Transitioning to WellnessLiving from another platform is easier than ever. For example, if you're moving from spreadsheets or another software, importing your clients means you don’t have to manually re-enter hundreds of client profiles. This saves hours of setup time and reduces the risk of errors.
With just a .csv file containing your clients' details, you can upload and import your client list in minutes. The import process automatically creates profiles for your clients, flags any issues with the data, and guides you through mapping each column to the appropriate client profile field.
Before you begin
To ensure a smooth import process:
Each client must have at least one valid identifier: First Name, Last Name, Phone Number, or Email.
Names should be in plain text using standard characters.
Phone numbers must contain only digits.
Emails must follow the standard format (email@domain.com).
The Date Format menu on the upload screen supports the following options. All date fields in your file must use the format you select.
US formats: MM/DD/YYYY, MM-DD-YYYY, MM.DD.YYYY
CAN/AUS formats: DD/MM/YYYY, DD-MM-YYYY, DD.MM.YYYY
ISO formats: YYYY-MM-DD, YYYY/MM/DD, YYYY.MM.DD
Text format: Feb 10 2020
Maximum file size is 20 MB with a maximum of 10,000 client rows per import file. For larger lists, split your data across multiple imports.
Key tips
Permissions
Staff members must have the Import Clients permission to complete this action.
Staff members must have the Manage client group members permission to map the Client Group column.
Data rules
The Lead source you set during import is saved on each imported client's profile. If you have an active Lead Created automation in Marketing Suite that targets Any lead source, or the specific source you chose here, every imported client is automatically enrolled in that flow and will receive its scheduled email, SMS, and push messages.
To skip these messages for a bulk import, leave Lead source blank or temporarily deactivate the automation before importing.
The Gender field is limited to Male, Female, and Prefer not to say. Other entries, such as M or F, won’t be imported.
Data for custom profile fields can’t be imported.
To import inactive clients, your file must include an Active column with values of Yes for active clients or No for inactive clients. Otherwise, all clients will be imported as active by default.
Duplicate clients are ignored, meaning any existing clients with the same email or phone number will not be updated.
When re-importing a file after fixing errors, successfully imported clients from previous attempts will be detected as duplicates and skipped, so only previously failed rows are added.
Client group behavior
Client group assignments only apply to clients created by the import. If a client already exists in your business, the entire row is skipped, including any client group values you've specified.
To assign or change the client group for existing clients, use the client groups page.
If a group in your file has auto-update enabled, the client is added temporarily. On the next indexing cycle, they're re-evaluated and removed if they don't meet the group's criteria.
To permanently add a client to an auto-update group, update the group's criteria.
Export your contacts from Mailchimp or Constant Contact
If you're switching to WellnessLiving for your marketing and want to bring your existing contacts with you, you can export your contact list from Mailchimp or Constant Contact as a CSV file and import it directly into WellnessLiving.
Before importing into WellnessLiving, you'll need to export your contact list from your email marketing platform. Both Mailchimp and Constant Contact let you export your full contact list or a specific segment.
Mailchimp – You can export a full audience or a segment of contacts, including tagged contacts. Your export may arrive as a ZIP archive containing multiple CSV files — one for each contact status (subscribed, unsubscribed, non-subscribed, and cleaned). Extract the ZIP and use the file or files containing the contacts you want to import. For export instructions, see Export contacts from Mailchimp in the Mailchimp Help Center.
Constant Contact – When exporting, select the fields you want to include in your file. At a minimum, select at least one of: First Name, Last Name, Email Address, or Phone. Include the Subscribed field if you want marketing status to carry over into WellnessLiving. For export instructions, see Export your email or SMS contacts into a spreadsheet in the Constant Contact Help Center.
Assign client groups during import
Once you've exported your contacts, you can bring them into WellnessLiving as client groups. Any group that doesn't already exist in your business is created automatically during import.
To set up client groups in your spreadsheet:
Create a column called Client Group. You can also name it Audience, Segment, Group, or Groups.
For each contact, list their group names using bracket syntax with no separators between brackets. For example: [Newsletter][VIP Members].
Don't use commas or semicolons between groups.
Group names aren't case-sensitive.
If a group name contains brackets, make sure all brackets are paired. Unpaired brackets will cause the row to fail to import.
Import a client list
To import a client list:
Open the App Drawer
 then click View All > Clients.
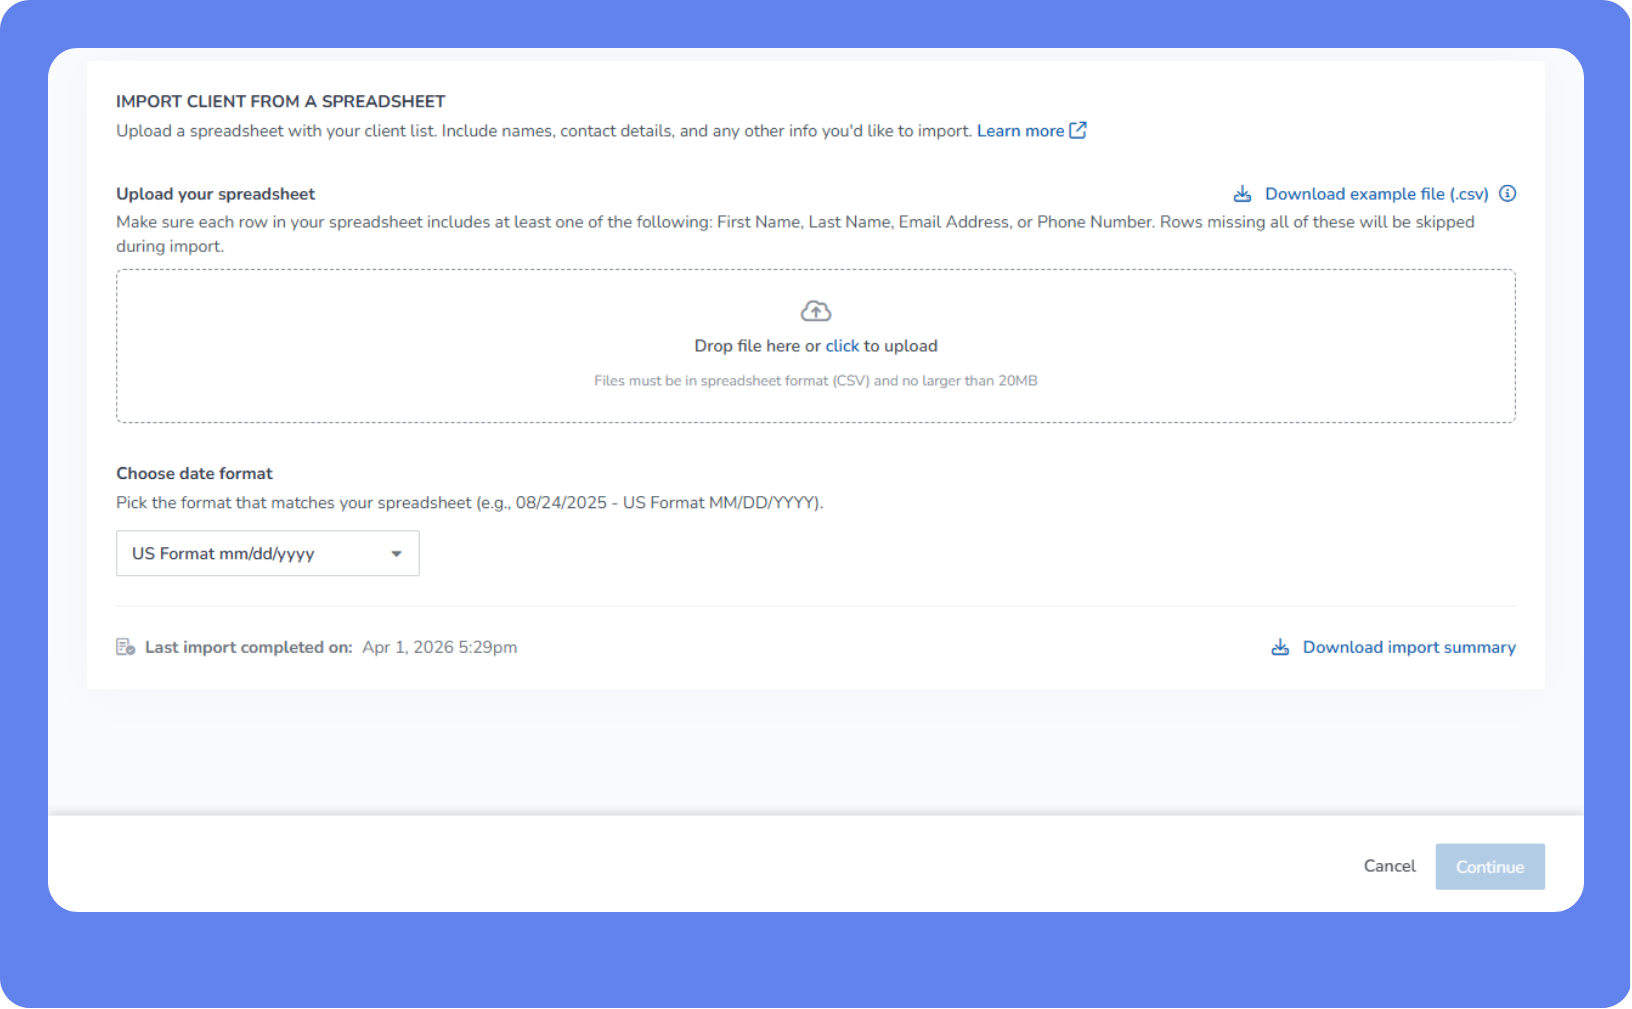
At the top of the page, click Import Clients.
Click Download example spreadsheet and add your data to the corresponding columns for an easy solution to create your own file.
Select your desired Date Format.
Upload the file by dragging-and-dropping or clicking to upload and browsing your files, then click Continue.
Review the data mapping.
Each column from your spreadsheet is assigned a Client Profile Field based on the most appropriate match. Click the name of the field to select a different field, if required.
Select Do not import for any fields you don’t want to upload to WellnessLiving.
Click Expand
 to view more information about the data in the field. You’ll see the mapped field information and the number of records in your file that have data in that column.
Rows that don’t contain an entry or contain invalid information are not imported.
Columns with incomplete data will display a warning icon instead of a green checkmark. Hover over the icon to see the issue.
Click Change spreadsheets at any time to cancel your import and choose a different file to upload.
When you’re satisfied, click Start import. A summary of your import is displayed.
Choose whether to Send the Welcome email to each client, then click Import.
The data is uploaded to WellnessLiving. A progress bar appears in the bottom-right corner to inform you of the upload status.
When the upload is complete, click Download error report to view a file with information about any issues that occurred during upload, then repeat the import for any missed information. This report helps you quickly identify and fix any problems, like a missing email or invalid phone number, without having to guess why some clients weren’t imported.
Click Close to complete your upload. Client profiles with the imported data can now be found and interacted with in your business.
If your import failed, check the following:
File format is .csv
Date format in your document matches your selection in step four.
Each client includes at least one valid identifier: First Name, Last Name, Phone Number, or Email.
Supported fields
The following fields are supported when mapping your CSV columns during the import. If a column in your file doesn't correspond to a supported field, select Don't import to skip it.
Field | Description |
|---|---|
Account Balance | The client's current account balance. |
Active Client | Marks the client as active. Enter Yes to mark the client as active, or No to mark them as inactive. |
Address | The client's street address. |
Birthday | The client's date of birth. |
Cell Phone | The client's cell phone number. |
City | The city associated with the client's address. |
Client Group | The client group(s) the client should be added to. Use bracket syntax with no spaces between brackets. For example: [Group A][Group B][Group C]. Group names aren't case-sensitive. Any group that doesn't already exist in your business is created automatically as a manually managed group. Note: The following column names auto-match to the Client Group field during import: Client Group, Group, Groups, Audience, and Segment. If you're migrating from Mailchimp, Constant Contact, or a similar platform, you can keep your original column names and the import wizard will recognize them automatically. |
Client ID | The client's unique identifier in your system. |
Country | The country associated with the client's address. |
The client's email address. | |
First Name | The client's first name. |
Gender | The client's gender. |
Home Location | The client's home location. |
Home Phone | The client's home phone number. |
Last Name | The client's last name. |
Lead Source | The source that referred or brought in the client. |
Postal/Zip Code | The postal or zip code associated with the client's address. |
Referred By | The person or source that referred the client. |
State/Province | The state or province associated with the client's address. |
Subscribed | Indicates whether the client is subscribed to marketing emails. |
Work Phone | The client's work phone number. |
Work Phone Ext | The extension for the client's work phone number. |