
Dashboards give you a customizable way to organize the reports that matter most to you. You can build multiple dashboards, each displaying a curated set of reports so you have quick access to essential information in one place.
There's no limit to the number of dashboards you can make. The Dashboards page is the first screen you see when you sign in to your account.
Key features of the dashboard
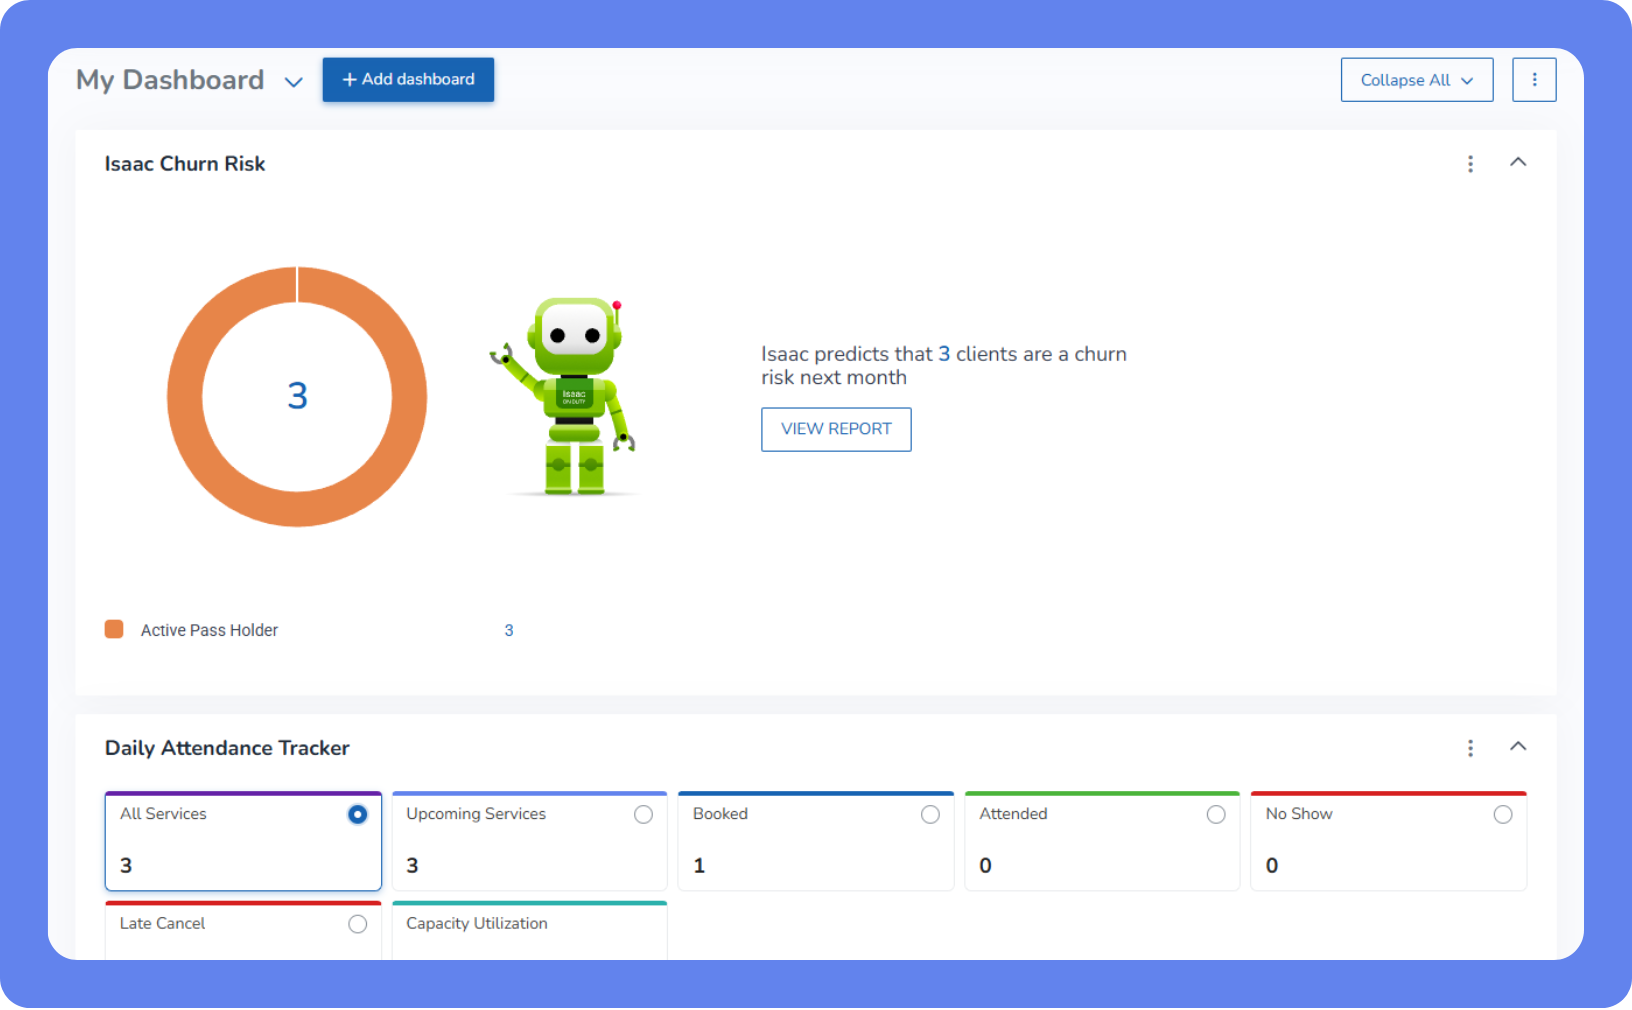
You can customize your dashboard to include the tools and reports you want to quickly see every day. By default, the dashboard includes the following tools:
Isaac Churn Risk – Provides a simplified version of the Isaac Churn Risk Report, which uses AI to predict client attrition with 87% accuracy, allowing you to proactively manage client retention. From the dashboard, you can see the number of clients likely to churn next month, shown as a whole or broken down by client types.
To view detailed information about these clients, click View Report or the number displayed to navigate to the Isaac Churn Risk Report.
Key Metrics – Displays a simplified overview of your most important business statistics, including total sales, booking requests, recurring membership payments, new leads, and more. Click the number displayed for each key metric to open the corresponding report.
Booking Requests Report – Displays all appointments and Book-a-Spot assets booking requests on the selected day. Use this report to accept or deny incoming requests.
Daily Attendance Tracker – Based on the Daily Attendance Summary Report, this displays details for the services scheduled on the selected day. Use this report to assess past, current, or upcoming daily activity, and to take action as needed for each service.
Key tips
You must have the Edit Dashboards, Delete Dashboards, Share Dashboards, and Export and print reports staff role permissions to complete these actions.
Reports that aren’t included in a staff member’s staff role permissions won’t appear on their dashboards. This applies to both created and shared dashboards.
Create or modify a dashboard
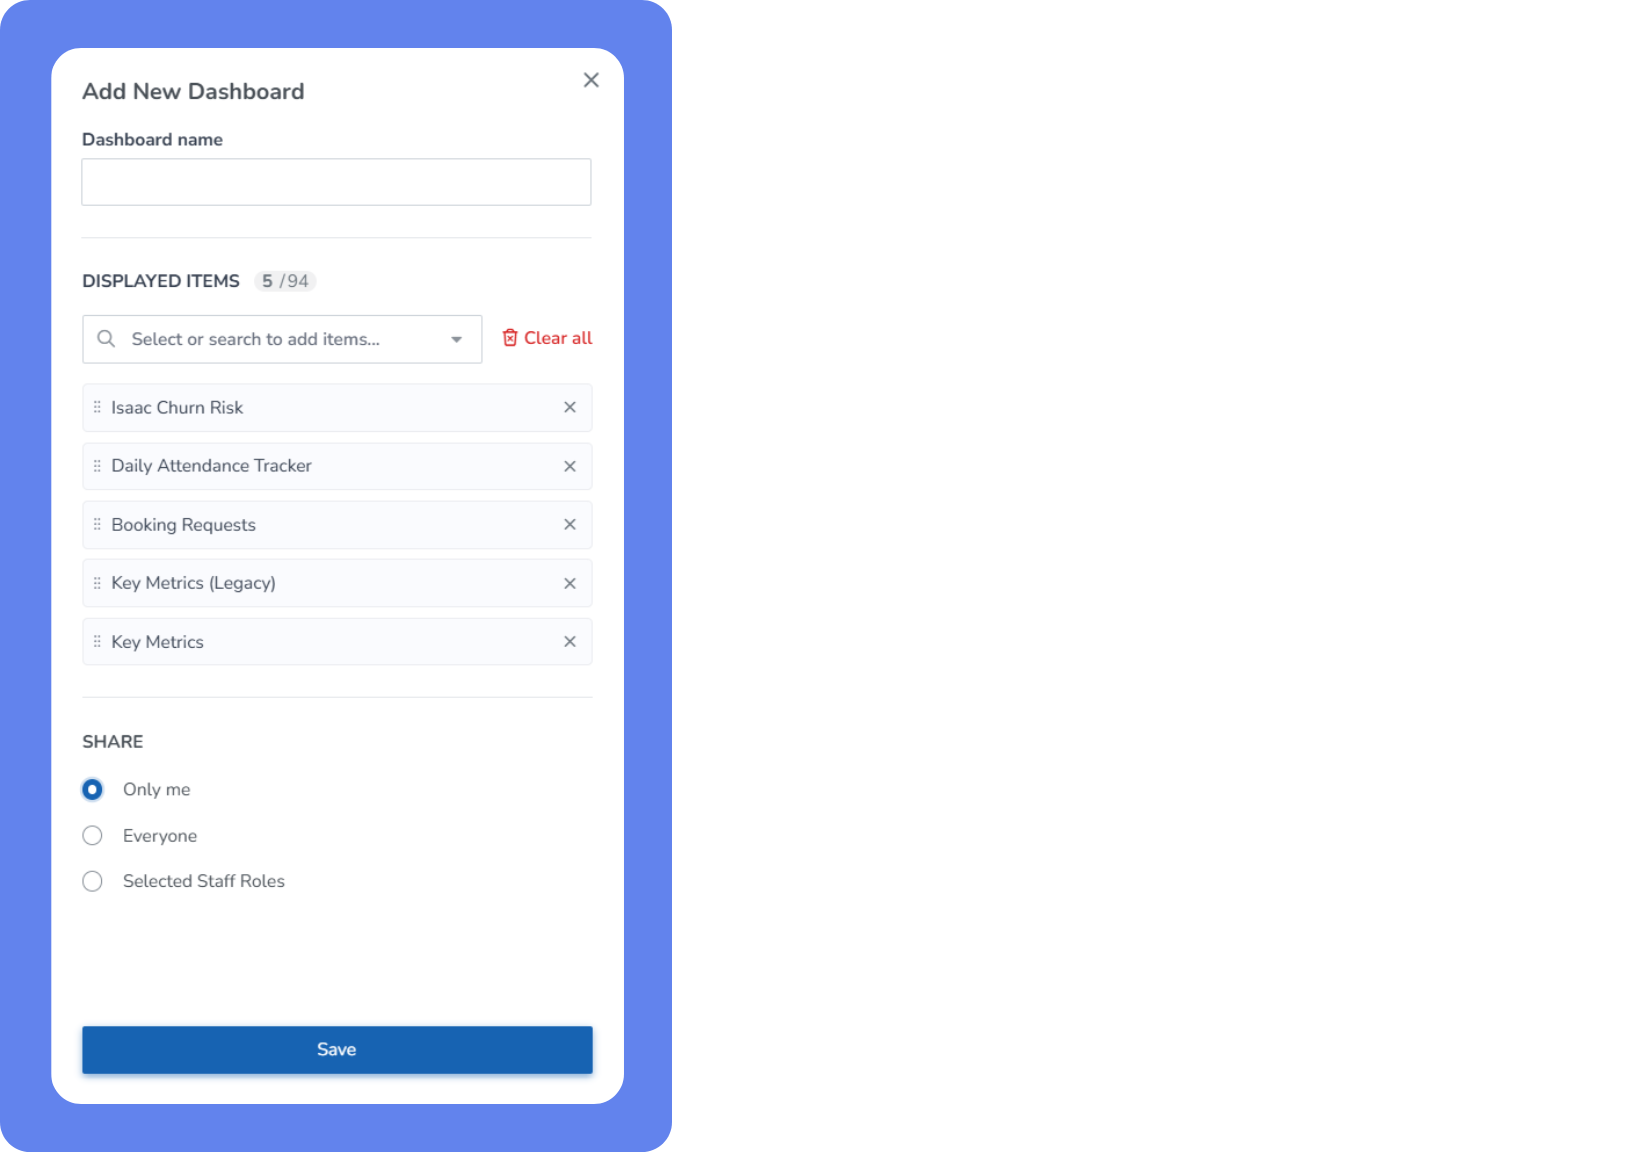
To create or modify a dashboard, complete the following:
Open the App Drawer
 then click View All > Dashboard.
Create or modify a dashboard:
To create a new dashboard, click Add Dashboard at the bottom right of the screen.
To modify a dashboard, click the dashboard name and select the dashboard you want to modify, then click Action
 in the top-right and select Customize.
Enter the Dashboard name.
Under Displayed Items, select which reports to display in the dashboard:
To add a report, click the report name under the Available field.
To remove a report, click the report name under the Selected field.
To reorder the reports, drag and drop them under the Selected field.
Under Share, select who the dashboard should be available to. Only the creator of a dashboard can modify the sharing options:
To make the dashboard private, select Only me.
To make the dashboard available for all staff, select Everyone.
To make the dashboard available for specific staff roles, select Select Staff Roles and choose the staff roles from the list.
To make the dashboard available for specific staff members, select Select Staff Members and choose the staff members from the list.
Click Save.
Add or remove key metrics from a dashboard
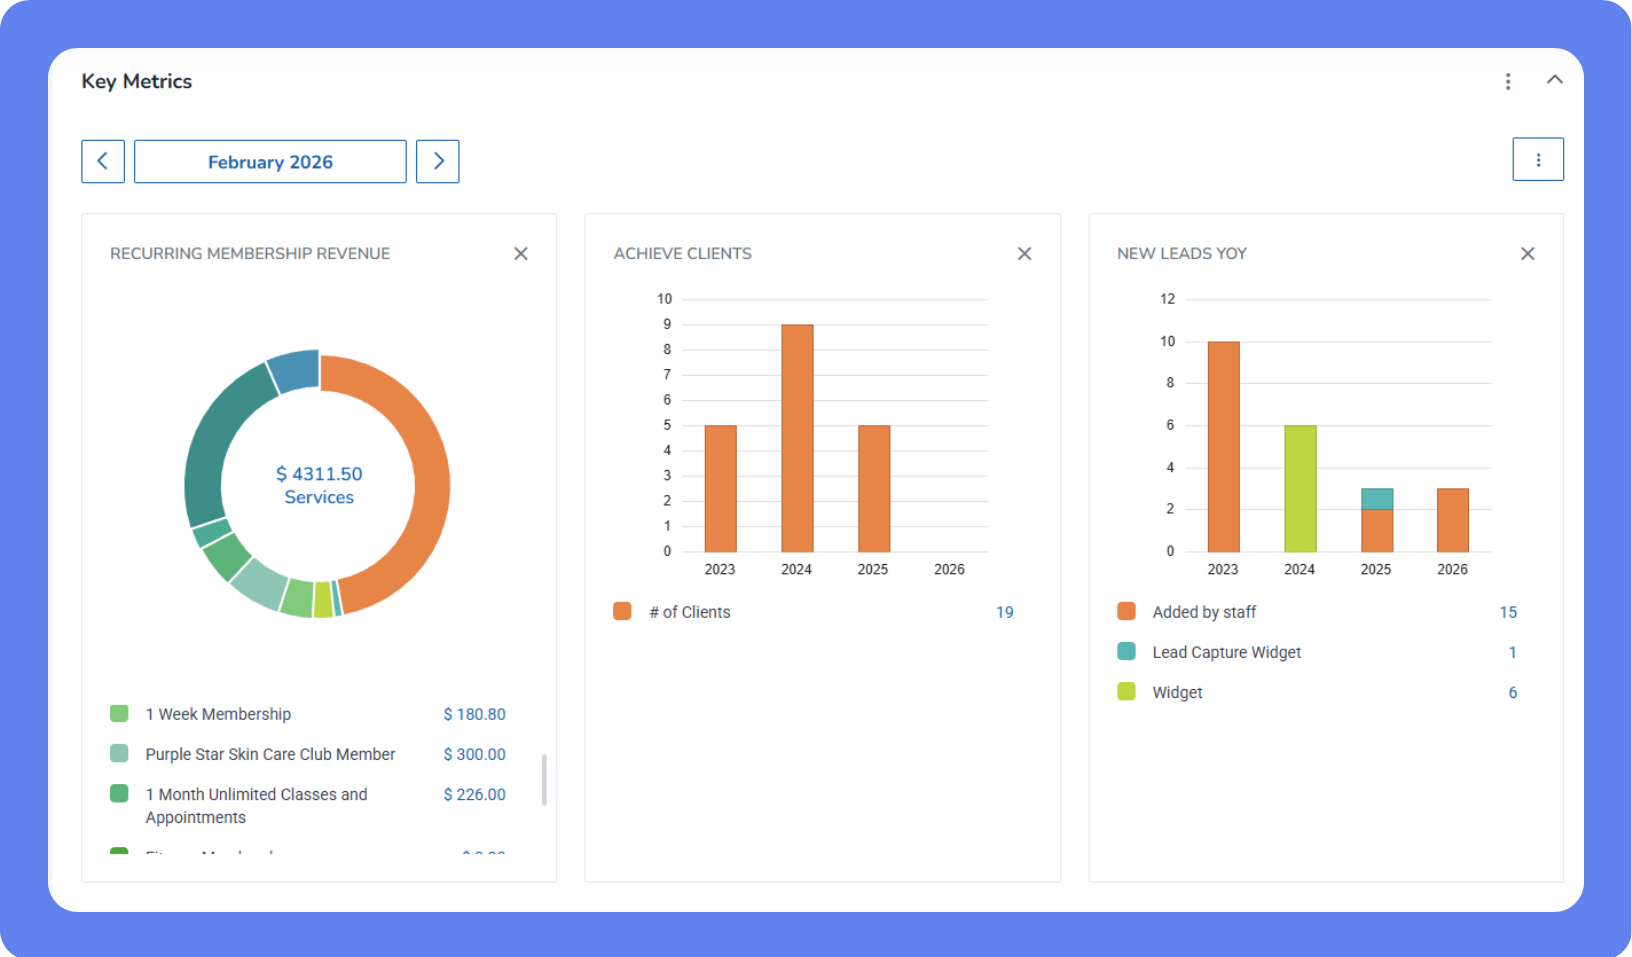
To add or remove key metrics from a dashboard:
Open the App Drawer
then click View All > Dashboard.
Click the dashboard name and select the dashboard you want to view.
Modify the dashboard to include the Key Metrics if it doesn’t appear.
Expand the Key Metrics section if it’s collapsed.
Click Action
within the Key Metrics section, then select Customize.
Add or remove the desired metrics. The options under Selected appear on your dashboard.
Click the options under Available to add them.
Click the options under Selected to remove them.
Drag-and-drop options under Selected to change the order they appear on your dashboard.
Expand or collapse reports inside a dashboard
To expand or collapse reports inside a dashboard:
Open the App Drawer
then click View All > Dashboard.
Click the dashboard name and select the dashboard you want to view.
Expand or collapse reports using one of these methods:
To expand or collapse a single report, click Expand
 or Collapse
  next to the report name.
To expand or collapse all reports in the dashboard, click Expand All or Collapse All at the top of the dashboard.
To view only the summary of a report, click Collapse to summaries at the bottom of the report. To expand the summary, click Show full report.
To view only the summaries of each report, click Expand All at the top of the report, then click Action
in the top-right and select Collapse to summaries.
Reorder list of dashboards
To reorder list of dashboards:
Open the App Drawer
then click View All > Dashboard.
Click the dashboard name, then drag and drop the dashboard names to reorder the list.
Reorder reports on a dashboard
To reorder reports on a dashboard:
Open the App Drawer
then click View All > Dashboard.
Click the dashboard name and select the dashboard you want to rearrange.
Rearrange the dashboard using one of these methods:
Drag and drop the name of any report to change its order in the list.
Click Action
 next to the report and select Move up or Move down.
Remove a report from a dashboard
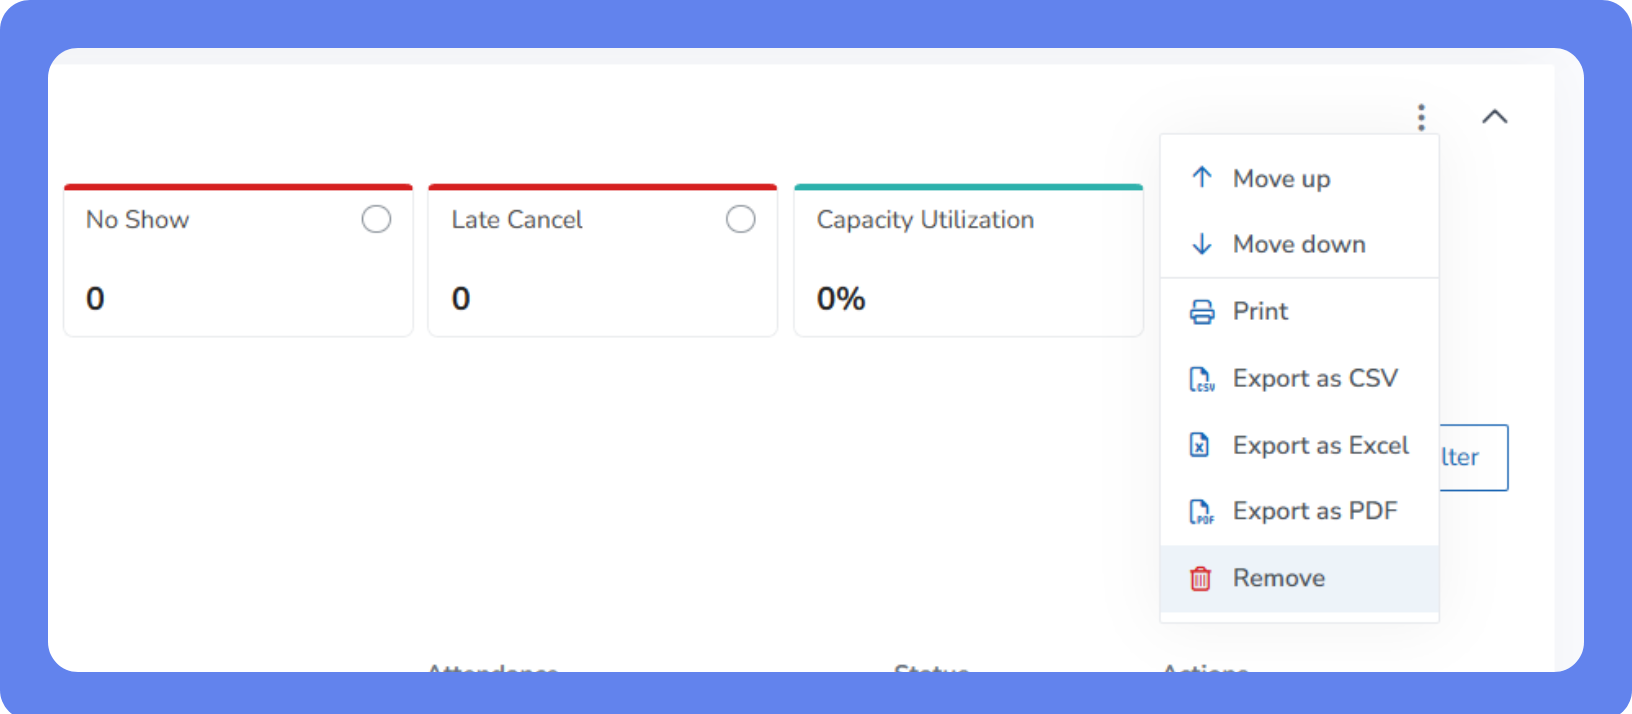
To remove a report from a dashboard:
Open the App Drawer
then click View All > Dashboard.
Click the dashboard name and select the dashboard you want to remove a report from.
Click Action
next to the report and select Remove.
In the confirmation popup, click Delete.
Delete a dashboard
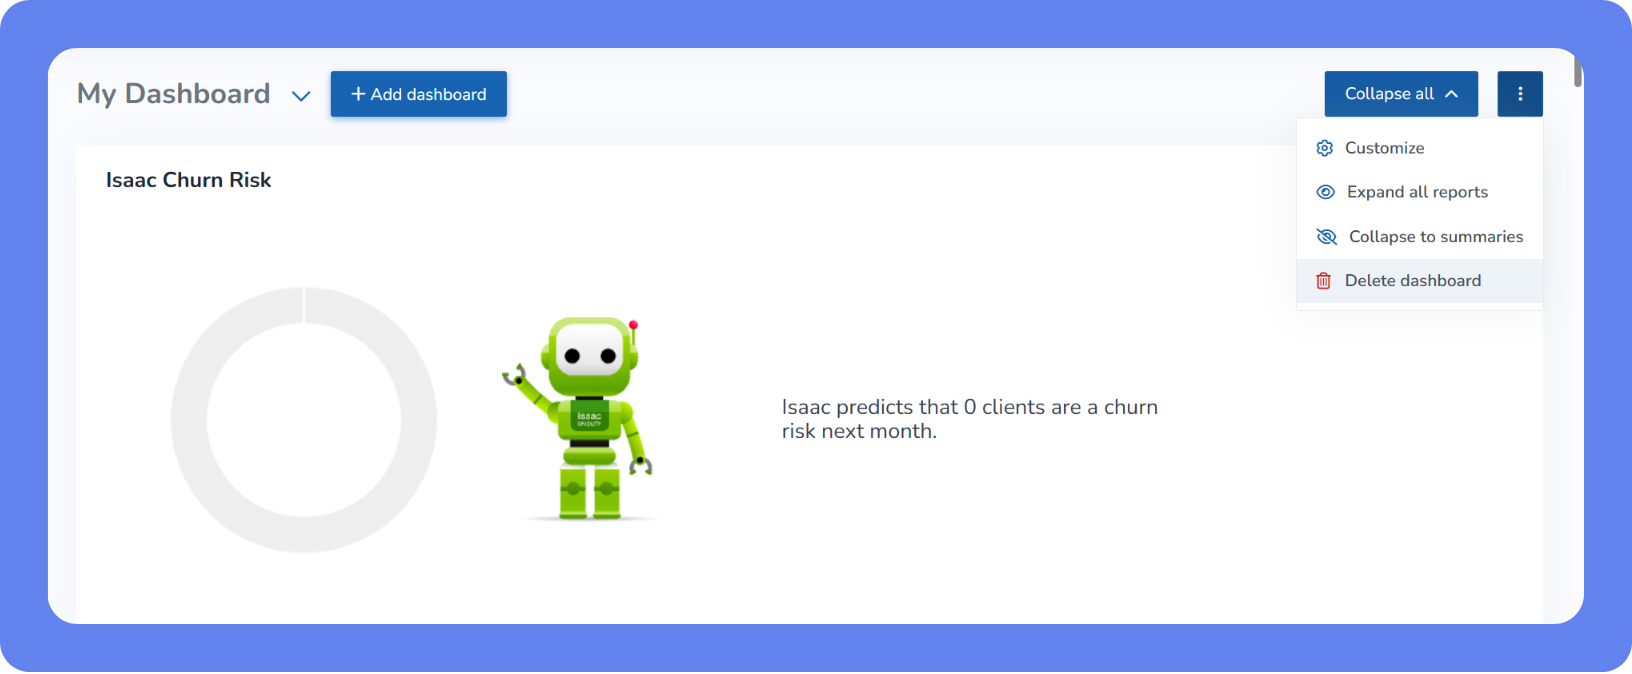
To delete a dashboard:
Open the App Drawer
then click View All > Dashboard.
Click the dashboard name and select the dashboard you want to delete.
Click the Action button
in the top-right and select Delete dashboard.
In the confirmation popup, click Delete.